Add next in . Do NOT use www. for the new_domain Maria's Blue Crayon: January 2017

Sunday, January 29, 2017

Mini Heart Pouch Crochet Pattern

*** You can purchase this inexpensive pattern here for an easy read/follow along printable, and to help support my blog. Thank you! ***

I've been dying to post this pattern for a while now! My testers approve and Paige from Azren Photography has created beautiful pictures of this mini heart pouch! I'll wait while you stare at them...


I really couldn't stick to just one "theme" to post, they're all too beautiful not to share.
You can find her here on Facebook and Instagram.

So anyway, the knit stitch AKA waist coat stitch AKA what ever you want to call it has been really popular, and I kept swooning over how much it resembled knit! And when I saw that a heart pattern could be created from this stitch, I knew I needed to make something with it. If you haven't seen or tried this stitch yet, I advise you do. It's super easy! Oh, and the color possibilities!

Since this was a very basic stitch, I wanted to mix it with other media to really give the item depth so I decided on making a small pouch complete with lining and a zipper on top for closure. Nobody can have enough bags. I put bags IN my bags. Like since I carry multiple chapsticks with me, I like to keep them all in one place. Ya know what I mean? Small sized pouches where you can store your small items to keep them neat and tidy always come in handy.

The pouch measures about 6 inches in width and 4.5 inches in height. It's perfect for make-up, craft items/notions (think: buttons, needles, safety eyes, stitch markers, pins, etc.), small office supplies, small planning accessories, change/small bills, nail polish, jewelry, crayons and a small notepad(for your kids), bandaids/sanitizer/OTC meds for your purse, ANYTHING! I'm sure you can think of at least a few other items to store in a small pouch that can go with you anywhere. Like I said, I'm a fan of small pouches. I use them for everything.

So now that you feel the need to make ALL the small pouches, here's the run down..


Materials
Worsted weighted yarn in contrasting colors. I used the following:
Main color used: Navy in Vanna’s Choice Lion Brand Yarn
Second color for hearts: Pink in Vanna’s Choice Lion Brand Yarn
G hook
Stitch marker (optional)
7” zipper
Fabric for lining
Thread and sewing needles
Sewing machine (optional)

Special Stitches/Techniques
Knit stitch AKA waist coat stitch
Color change/tapestry crochet

**If you need video instructions for color changes, I recommend this video

This pattern will be worked in rounds. When finished, it will be sewn to close up the bottom. 
A stitch marker is recommended, but is optional. I found it easier to use a stitch marker to keep my rows uniform/ensure the same number of stitches per row. 

I did not carry my yarn when changing colors, I simply let go and picked up the color I needed as I went. You may choose to do either.

Pattern

Row 1: Using main color, Chain 49, join to first chain being careful not to twist the chain

Row 2: Chain 1, SC, join to first SC (48)

Row 3: Chain 1, *SC in next three stitches with main color, SC in next stitch with second color, repeat from * SC in last stitch with main color, join to first SC (48)

Row 4: Chain 1, SC around with main color, join to first SC (48)

Row 5: Chain 1, 1 SC with main color, *1 SC with second colors, 3 SC with main color, repeat from *, join to first SC (48)

Row 6: Chain 1, SC around with main color, join to first SC (48)

Repeat rows 3-6 until height of pouch is 4.5” or to desired height.

Taking the main color and a tapestry needle, sew the bottom of the pouch shut.

Zipper and Lining

**If this is your first time sewing in a liner/zipper I suggest you watch this youtube video.

The pouch measures about 6”, to keep it safe I used a 7” zipper. For fabric, I used 100% cotton fabric found at Joann’s. 

Measure the height and width of your finished pouch.
Lay fabric down on a flat surface. Measure out the width of the pouch and double the height - adding about an inch to the height and width to allow room for sewing.
Example: My pouch turned out to be 4.5” in height and 6” in width. My piece of fabric I measured out was 10” in height and 13” in width. 

Fold the fabric in half so the design part is on the inside. Sew up both sides by hand or sewing machine. Fold down the top outer edge about half an inch and sew around.
Place lining aside.

Take your zipper and unzip it. Place it on the top of the inside of the bag and start to pin it in place. Once you have your zipper sewed on, take your lining and place it inside the bag. Sew the lining onto the zipper. **I hand sewed the lining and zipper onto the crocheted item and used a sewing machine only for the forming of the lining.

TIP: If you would like a larger pouch, simply chain in multiples of 4 +1, add as many rows as needed.

I would love it if you share your finished projects with me! Feel free to tag me on instagram @mariasbluecrayon, leave a comment below, or show me on Facebook!


Labels: ,

Sunday, January 22, 2017

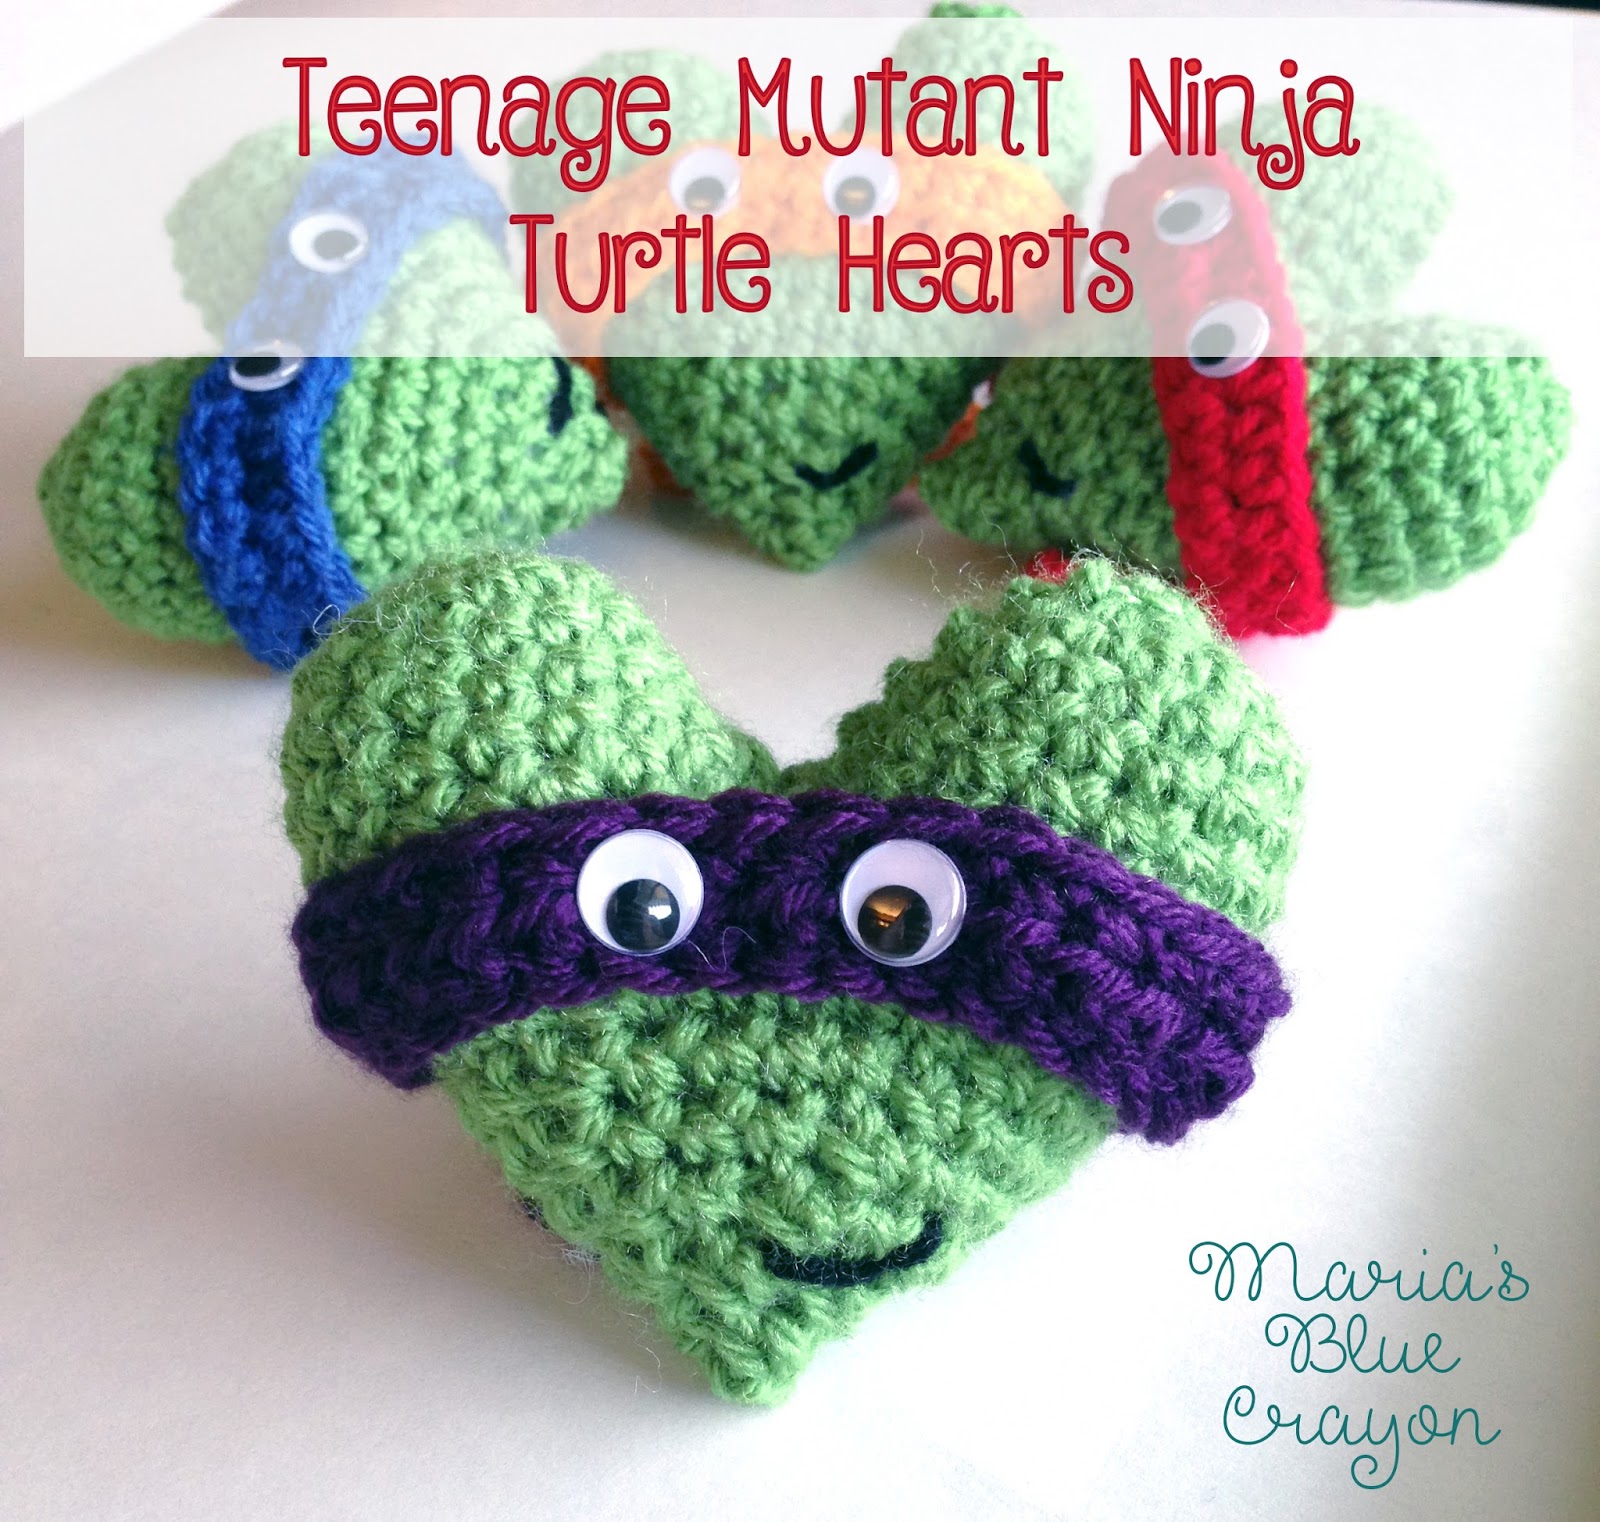
Teenage Mutant Ninja Turtle Hearts

****You can purchase this inexpensive printable pattern here for easy reading and following.  Thank you for supporting my blog! :)


Valentine's Day is coming near! Make these cute TMNT hearts for your little Valentine's! 
If you follow me on Instagram (which you should, because I post lots of photos of my current works - here's the link), you know I've been greatly anticipating to release this pattern! Let's cut the chit-chat and cut right to the chase! 


Materials
Yarn (green, red, orange, purple, blue, black)
10mm googly eyes
G hook
tapestry needle
scissors
poly-fil

Amazon Picks


Special Stitches
Invisible SC decrease: Similar to a SC decrease, but instead of going through both loops, only go through the front looks to make a clean invisible decrease. 
[[Insert hook into first front loop of stitch, yo pull through, insert hook into second front loop of stitch, yo pull through, yo pull through all.]]

Pattern

We will start by making two top bumps of the heart.
Using green yarn:

Row 1: Start with a magic circle, SC 4 into the circle, join
Row 2: Chain 1, 2 SC in each stitch, join (8)
Row 3: Chain 1, 2 SC in each stitch, join (16)
Row 4: Chain 1, SC in each stitch around, join (16)
Row 5-6: Repeat Row 4
Fasten off and weave in ends.

Once you have two top bumps, next we will attach the top bumps and start working around both bumps to make the body of the heart.

With one of the top bumps, insert hook into joining space from the inside of the top bump out, take the second top bump and insert hook from the outside in at the joining chain so both pieces are on your hook. Take yarn in same color and attach pieces by making a slip knot on the end of the hook and pulling through both pieces. Chain 1 and continue to work in rounds.

Row 7: SC into next space to the left and continue to SC around both pieces (including the other side of the joined space). Join to first SC (34)

Row 8: Chain 1, SC around (34)

Row 9: Chain 1, *SC 15, invisible SC decrease, repeat from * (32)

Row 10: Chain 1, *SC 6, invisible SC decrease, repeat from * (28)

Row 11: Chain 1, *SC 5, invisible SC decrease, repeat from * (24)

Row 12: Chain 1, *SC 4, invisible SC decrease, repeat from * (20)

Row 13: Chain 1, *SC 3, invisible SC decrease, repeat from * (16)


 **At this point, you will sew the mouth on with black yarn. Stuff heart with poly-fil (stuff a bit more to account for the last two rows).


Row 14: Chain 1, *SC 2, invisible SC decrease, repeat from * (12)

Row 15: Chain 1, *SC 1, invisible SC decrease, repeat from * (8)

Row 16: Chain 1, invisible SC decrease around (4)

Fasten off and weave in ends.


Now that we have our heart, we will need to make the mask.

Row 1: Chain 44 with color of choice (purple, orange, blue, red)
Row 2: HDC into second chain on hook and HDC in each stitch across
Row 3: Chain 1, SC across
Fasten off and weave in ends.


Sew on mask so it fits just below the two top bumps on the front and criss-cross them on the back to make it look like the mask is tied on.

Using a hot glue gun, glue on google eyes.


I hope your Valentine's get a kick out of these little guys! XOXO


Labels: , ,

Saturday, January 14, 2017

How To Guide to Designing Your Own Crochet Striped Blanket


Winter is here! It's been mild so far, but I see some snow in the forecast and low temperatures. That means weekends will consist of cozy PJ's, fluffy slippers, hot chocolate with extra cocoa, faux crackling fire on the TV, and a good book or some yarn - all being enjoyed under a soft, snuggly blanket!

The blanket puts the peanut butter icing on top of this warm, delicious double chocolate cake (if cozy days were a cake). I live for throws, afghans, and blankets. Needless to say, I have several. Believe it or not, not all of them are crocheted.. but my favorite ones? Yeah, those are crocheted.

I'm going to show you how to make your own striped blanket, custom to your liking! There's lots of things to think about here - colors, size, yarn, texture, and stripe pattern - all your choice! Make your own and get creative as you'd like!

Below, you will see the striped blanket I made for my son. He is particular about where things go, so his bedroom blankets stay in the bedroom. I made him a snuggly blanket for sofa cuddles that is perfect for his size!


Size
So let's start with size - what size will you want to make your blanket? You can make it completely custom, but I have compiled popular sizes to guide you in the right direction!


It will be important to work up a gauge swatch (if you are going to be using the stripe generator that I will discuss a few paragraphs down) in order to get the number of rows you need to make to correspond to the size blanket you want. It's important because depending what stitch and hook size you use, the blanket size will vary. For instance, if you are using a basic single crochet and make 100 rows, it will be a lot smaller than doing 100 rows with double crochet. Also, if I use smaller hook like an H hook versus a K hook, the blanket would be smaller as well.

To make a gauge swatch, make a 4" x 4" square with the stitch and hook you plan on using. Once you have made that, you can count how many rows and use a simple formula to find how many rows your desired size the blanket will be.

Height of desired blanket (inches) / 4 inches x number of rows in gauge swatch = Number of rows needed for desired blanket size
(Orders of operations do not apply here. Take the height you want your blanket to be, divide by four, then multiply by the number of rows your gauge swatch came out to.)

As far as the width goes, when you start to make your blanket, you will simply want to chain until you get to the desired width. If you are using a particular stitch pattern, make sure you check the pattern for sizing (it may need to be worked in multiples of 2, 3, etc.)


Colors
Choosing colors - this is my favorite part! Color possibilities are endless, and this is also a good way to use up your extra yarn to make a colorful blanket. Pick as many or little colors as you'd like. If you are having trouble coming up with a color scheme, you can search Pinterest for color palate inspirations and go from there! Or simply go to the store, start grabbing colors you love and see how they look next to each other.


Yarn
There are several different types of yarn that produce different textures. For example, Bernat blanket yarn has a rich, velvetly, and squishy feel when used, while a regular worsted weighted yarn like Lion Brand Yarn Vanna's Choice will give a light and soft feel. Shop around! If you go to different craft stores, they may offer different brands. And remember, hook size matters! If you're not sure what hook size to use, check the label of the yarn of choice to see what hook size is recommended.
I shopped at my local Joann's and searched for the colors I liked once I figured out what type of yarn I wanted to use. The type of yarn part goes hand in hand with the color. You may find the colors you love, but not the feel you are looking for and vice versa. My son's blanket is made with Red Heart baby yarn. I know I wanted the soft feel of baby yarn, so that's where I started. I was quite pleased with the colors they had available, usually baby yarn is mostly pastel. (I would have loved to put black in this, because that is my son's favorite color but that was not available in any type baby yarn).
Here are some types of yarn to think about:

Bernat blanket yarn
Chunky/Bulky yarn (any brand)
Worsted Weight yarn (any brand; a majority of the yarn you will find is worsted weight)
Baby yarn (any brand)

Tip: I advise using any type of acrylic yarn for a blanket, because it makes it easily washable. Using animal fiber such as wool is much harder to wash and if not done properly may shrink or damage the blanket.

Texture
Texture will play a big part on your blanket! Do you want a tight stitch like a single crochet for extra warmth? Or do you want something breathable like a double crochet? The rule of thumb is, the smaller/tighter the stitch (single crochet&half double crochet), the warmer and thicker it will be. The bigger the stitch (double crochet & trebles), the more flowy and breathable it will be. Play around with hook size as well! Using a large hook with a tight stitch will give you a good medium as well as using a smaller hook with a larger stitch. Check out my blog post here that may give you an idea of what stitch you would like to use. When in doubt, use a simple stitch such as a half double crochet or a double crochet! It will create a basic stitch that looks lovely in a striped blanket.


For my blanket, a basic double crochet stitch was done with a G hook. I created a perfect balance by using a double crochet, which I knew to be a larger and more breathable stitch with a smaller hook to make it a bit tighter and cozier.


Stripes
Now that we have our materials and an idea of what size we want to make our blanket, this stripes generator will help us create a fun pattern of stripes! This site is very simple and it will give you a generated stripe pattern when you plug in what colors you will be using, how many rows your blanket will be, and what you would like the stripe widths to be. Play around with it! I allowed multiple stripe widths (1, 2, 3, and 4) to create a fun, random pattern! This is also a fantastic way to play around with color combinations.
Note: Once you generate the stripe pattern and you are not satisfied with what it came up with, simply refresh the page to generate another! If you are on the fence about what is generated, go ahead and screen shot the page or even print out the pattern because once you hit refresh again you can't go back. 


Now that you know what options are out there, go out and have fun! I would really love to see what you guys come up with, especially since the possibilities really are endless here!


Labels: ,

Best Crochet Stitches for Blankets

Crochet is endless in terms of stitches and patterns! I've rounded up my favorite stitches to be used in afghans, throws, and blankets.

Be sure to pin this post to your Pinterest boards for safe keeping!


1. Waffle Stitch


This crochet stitch gives you a waffle like texture. This stitch will give you a solid, warm, and squishy blanket! Everything you want in a cozy blanket to snuggle up in.

I made my own waffle stitch blanket with blocks of color for my son - I love it!

Get the tutorial here.

2. Granny Crochet Stitch


A classic granny stitch in rows. This stitch only consists of double crochet and chains!  Get the pattern here


3. Crossed Half Double Crochet Stitch


Perfect for a knitted look. Click here for the pattern.


4. Moss Stitch


Great for beginners! Video tutorial here


5. C2C Stitch


I love love the C2C stitch! In this tutorial, I show you how to use half double crochets (versus the double crochets) using the C2C stitch technique. I find using the half double crochets gives you less gaps/holes in the blanket which makes it warmer!


6. Shell stitch


Perfect for a delicate feel! Check out the tutorial here.


7. Basket Weave Stitch


This makes a great thick blanket for maximum cuddles! Video and written tutorial here.


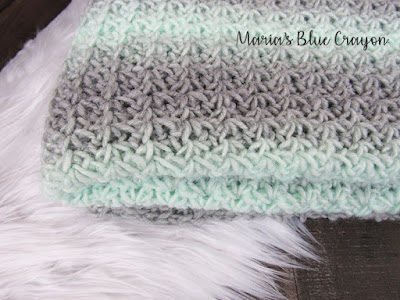
8. Spider Stitch


I made a big blanket with the spider stitch and it's wonderful! It's an easy stitch and gives such a pretty texture.


9. Pebble Stitch


This photo tutorial shows you how to make this pretty stitch.

10. Bobbles


Bobbles are such a fun texture in crochet! In this tutorial, I show you how to alternate bobble and double crochet rows to make a large granny square - video tutorial plus written pattern included!


What stitch will you choose? And which one's have you tried already?

Labels: ,

Friday, January 6, 2017

Simple Crochet Ear Warmer Free Pattern for Beginners

These quick and easy crochet ear warmers are the best! They're so easy to make (very suitable for a beginner crocheter!) and they are a great stash buster!


I have to start by saying, this is by far the easiest and quickest project I've ever done! So whether you are brand new to crochet or have been in the game for a while, this project will take little time (and yarn!).

I made a bunch of these ear warmers pretty neutral colors. I used Lion Brand Vanna's Choice which is a worsted weighted yarn. I like the fluffiness it seems to give and is a true worsted weight yarn that made the headband cozy.

Another yarn I would suggest to use is Hobby Lobby's I Love This Yarn! They have several colors to choose from and it has the same soft, cozy feel (maybe even softer, to be honest!).

I originally found a pattern for a cinched ear warmer here by Little Monkey's Crochet but have modified to my liking. I will be referring to this talented crocheter when it's time to make the final touches on this ear warmer, which she provides an excellent tutorial of.


All you'll need to know for this simple crochet ear warmer is how to chain and half-double crochet. That's it! We will be working in the round and it's only a total of 8 rows. 

These are great stocking stuffers or small gifts. That means you can make a bunch for your family and friends in a weekend! 

Or you can sell these ear warmers at craft fairs if you sell your crocheted work! When I use to sell my finished crocheted items, these were always a good seller. 

They were my lower priced items at about $10-12 dollars and people always love something simple and easy to wear with anything!


I love having options, so all of those ear warmers are actually mine - ha!

This ear warmer is so customizable if you want to get creative!

Want a more snug fit? Chain less in the starting row. 

You can also add more rows or even use a chunky yarn! (If you use a chunky yarn, I suggest using a bigger hook and less chains in the beginning. Simply measure the chain around your head to get the fit you want.)

I bet this would also look great with a variegated or marled yarn!

Add a cute flower or buttons on the side!

See? There's lots of possibilities to dress this little headband up, or just keep it simple!


Crochet Ear Warmer Pattern

Materials
H/5.00 mm hook
Any worsted weight yarn
I used Lion Brand Yarn Vanna's choice in various neutral colors
Scissors 
Tapestry needle to cinch and weave in ends

Amazon Picks: (affiliate links)


Stitches to know
Chain
HDC (half-double crochet)
(If you are brand spankin' new to this, I suggest any and all videos by Mikey from the Crochet Crowd. Here is a link to the youtube video to learn half-double crochet)

Pattern notes:
If you'd like to make a child size, the two changes you need to make: chain 52 and repeat Row 2 for 7 rows

Pattern

Row 1: Start by chaining 56, careful not to twist the chain, slip stitch into the first chain
Row 2: Begin working in rounds, Ch 1 and HDC around, join to the first HDC
Repeat Row 2 until you have 8 rows (or more if desired, this ear warmer can be tailored to your preference)
Fasten off and leave long tail.

Now that you have the crocheting part of the ear warmer finished, visit Little Monkey's Crochet to learn how to cinch the ear warmer together! It's a fairly simple technique and really brings the ear warmer some charm!


If you enjoy making easy and simple patterns you may like these patterns I have for free on my blog:

Crochet Infinity Scarf - this scarf is chunky, cozy and so easy to make!

The Aspen Scarf is made with a worsted weight is a more elegant infinity scarf. Super easy too - it's all one stitch!

The Basic Crocheted Beanie is just what the name says - basic! It's one of the easiest and quickest hats you will make!

Labels: , , ,