Add next in . Do NOT use www. for the new_domain Maria's Blue Crayon: November 2018

Monday, November 26, 2018

Best Free Crochet Patterns - In Stitches Link Up Party Week #24

This week's round up includes the top free crochet patterns that would all be perfect gifts for this holiday!


Grab the patterns in the links below for top crochet patterns this week! Don't forget to keep scrolling for even more free crochet patterns!

1. Mrs. Plum Chunky Hat by Crochet 365 Knit Too
2. Verity Beanie by Crystalized Designs
3. Amigurumi Seal Pup by Grace and Yarn
4. Hygge Shawl by Love Life Yarn 
5. Penny's Scarf by Stitching Together

There are free crochet patterns being submitted by more talented crochet designers at the very bottom! Check out your favorites!

Find even more free crochet patterns in past week's link up parties here!

Every other Monday, you will find a round up of the Top 5 Best Free Crochet Patterns! Plus, we (the hosts) will be sharing our own latest free crochet patterns on our blog. Throughout the week, links will be added so be sure to keep an eye on what others have to share as well!

If you are a crochet blogger that has free patterns to share, this is a great party for you to get your work out there! Simply follow the instructions below to 'link up' your free crochet patterns each week. If you are in the top 5 (most clicked patterns), your pattern will be shared and promoted by all of the crochet bloggers hosting this party! You can find more details below.

I am hosting this link up party right here on Maria's Blue Crayon, as well as on, Nicki's Handmade Crafts, Naztazia, Salty Pearl Crochet and The Unraveled Mitten. We are really excited to start this link up party and hope you join along!

Be sure to check out our social media pages and follow us for more crochet patterns and inspiration!


Find the newest and free crochet patterns from the hosts at the links below!


Ready to join In Stitches - The Best Free Crochet Pattern Party?

Want to add your link? Please remember to link to your actual project URL and not your homepage URL, and use the name of your project or post, not your own name. Just click the blue “Add Link” button below!

Please visit at least one other link, you just might find a new favorite project! AND – your clicks are how we determine which projects to feature each week! Feel free to leave a comment at the pattern link to provide feedback and show support.

No Etsy stores, Facebook pages, giveaways, or other link parties. Just blog posts to your actual crochet patterns that are accessible for FREE!

If your project gets featured as a top link, please do not submit that same project to future parties. We want to party fair! :)

Now let's get this party started! Please remember that the links below are shown in random order and are not shown according to when they were submitted or how many votes they received so far.


Labels: ,

Sunday, November 25, 2018

Crochet Christmas Ornaments - Mini Pom Pom Beanies Free Pattern

Scroll down to get the free Crochet Mini Pom Pom Beanie Christmas ornament pattern.


Last year, I had the pleasure of designing these adorable little crochet Christmas ornaments using Love Crochet's Paintbox Yarns. If you haven't used these yarns before, they are fabulous!

They are only available online and I understand the cautiousness of buying yarn you can't touch.  If I had to compare it to another yarn in stores, I would compare it to Lion Brand Vanna's Choice but perhaps even softer. Plus, they have many beautiful shades of colors! You can check them out here.


For these crochet Christmas ornaments, I wanted to have fun with the color and make brightly colored ornaments. I opted to use two different colors for each beanie and it made it more fun to mix and match all the colors together!

MORE FREE CHRISTMAS CROCHET PATTERNS


These Christmas ornaments are so easy and quick to make! You will be able to make a handful of these in just one sitting.

Make a few or make a bunch, they make great yarn stash busters and who doesn't love that?!


Although I did hang these on my tree, I think they could be cute little gifts as well to use as keychains. Or you can make a bunch and make them into garland to decorate any room.

Happy Holidays from my family to yours and Happy Crocheting!


PURCHASE THE AD-FREE PDF ON RAVELRY FOR YOUR CONVENIENCE.
Thank you so much for your support! Every single purchase helps me support my small family!

PIN IT TO YOUR CROCHET BOARD ON PINTEREST.
Thank you so much for sharing - it really helps my blog going when you share in any way you can!


Free Christmas Ornament Crochet Pattern

Materials
Paintbox Yarns Aran/worsted weight in any color
E/3.50mm hook
1 5/8” Clover Pom-pom maker
Tapestry needle
Scissors

Patern Notes

Pattern is written in US terms.

Chain 1 in the beginning of each round does not count as a stitch.

One hat will be made with two colors: main color and trim color

Dimensions
3” x 3.5” with pom pom

Gauge
4 st x 3 rows in half-double crochet

Pattern

Abbreviations:
Ch = chain, SC = single crochet, HDC = half-double crochet

Pattern

Starting with trim color

Row 1: Ch 4, SC in second ch from hook and across, turn

Row 2-24: Ch 1, SC across, turn

Ch 1 and join to Row 1 by slip stitching across to connect both ends to make the trim


Change yarn to main color, ch 1 and SC around the side of the trim, join to first SC (You should get 24 stitches around if you SC into each row of the side of the trim, it’s not detrimental to get this exact number)


Ch 1, HDC around, join to first HDC
Repeat until you have 5 rows of HDC in the main color
Fasten off

Using a tapestry needle, close up the top of the hat by weaving back and forth through the top loops. Pull tight and secure with a knot.


Make a pom pom using a 1 5/8” pom pom maker. Use an additional piece of yarn to secure the center on the opposite side. One piece of yarn will be used to attach to the top of the hat and the other piece to make the loop to hang as decoration.

To make the loop, knot 3-4 times and trim ends to create loop for hanging. For additional security, you can dab a bit of hot glue to the knot.

Use additional yarn tails on other side to attach to top of hat.

Labels:

Wednesday, November 21, 2018

Black Friday Sales - Crochet Designers Pattern and Crochet Products Sales

This year, I'm happy to be teaming up with my fellow crochet designers and bloggers to bring you a Black Friday Sales for our patterns!

In the first section, all of the crochet designers listed have 50% off their patterns and the code for the discount is the same for all shops to make it easy for you.

Use Code: BLACKFRIDAY50 for 50% off ALL pattern for the following shops. 

Maria's Blue Crayon

Snuggly Fox Designs

Green Fox Farms

Noor's Knits

Teez Topperz

E'Claire Maker

Cary's Custom Crafts

Raging Purlwind


In addition, I have rounded up other Black Friday Sales going on from other talented crochet designers so you can easily find them here! Be sure look closely at what kind of discount they have to offer and use their code if they have one!


Additional Crochet Designer's Black Friday Sales

BE SURE TO LOOK CAREFULLY AT THE DATES AND CODES (IF ANY) FOR THESE DISCOUNTS FOR OTHER CROCHET DESIGNERS. ENJOY!

Nicki's Homemade Crafts

11/24 - 11/26
Ravelry Sale 50% off ALL patterns. Use code: 50offBFS
PLUS buy both of her ebooks on Ravelry for a total of $25 with the code: BFSebooks
Nicki's Craft Store (crochet related merchandise): 20% off everything with code: BF2CMS


Crochet 365 Knit Too

11/21 - 11/25
Ravelry Sale 30% off ALL patterns. Use code: BFS18


Yarnhild

11/22-11/24
Use code: BLACKFRIDAYSALE

Spin A Yarn Crochet

11/23 - 11/26

Crafting Friends Designs

11/19-11/25

Crochet by Jennifer

11/20 - 11/25
Ravelry Sale BOGO patterns. Use code: BFBOGO2018
Etsy Sale 25% off. No code needed!

Divine Debris

11/20 - 11/27
Buy 1-2 patterns get 40% off
Buy 3-5 patterns get 50% off
Buy 6+ patterns get 60% off
Use code: ENABLER

Left in Knots

Now - 12/1
Scarfie Bundle Sale 16 patterns using Scarfie yarn for $12. No code needed!

Ashely Dylan

11/22 - 11/27
$1 patterns on Craftsy. No code needed!

3amgracedesigns

11/22 - 11/26

Hooked on Homemade Happiness

11/22-11/27
Ravelry sale ALL patterns 50% off - no code needed!

Two Brothers Blankets

11/23 - 11/26
Ravelry sale ALL patterns 50% off. Use code: MEGATHANKFUL

The Jonesy Co

11/23

Joy of Motion

11/23
ALL patterns 50% off. No code needed!

Crochet It Creations

11/22 - 11/26

Ambassador Crochet

Now - 11/26

Sweet Potato Crochet Creations

Now - 11/26
Code: ENABLER

The Purple Poncho

Now - 11/26
Code: ENABLER

Sincerely Pam

Now - 11/26
Code: ENABLER

Blackstone Designs

Now - 11/26
Code: ENABLER


A Crocheted Simplicity

Now-11/26
Code: ENABLER

Salty Pearl Crochet

No code needed!

The Unraveled Mitten

Now through 11/30

Snappy Tots

11/21 - 11/27
65% off patterns. No code needed.
(Plus more other opportunities for freebies and giveaways!)

Kristin Omdahl

Now through 11/26

Fiat Fiber Arts

Now through 11/26
*For crochet designers needing tech editing services*

Labels:

Sunday, November 18, 2018

Best Fun Winter Crochet Hats for Kids - Free Patterns


In this post, you will find the best crochet hats for kids that I have rounded up! I love all of these hats and a lot of them have the free crochet pattern for multiple sizes.

All of these crochet hat patterns for kids are free patterns - click on the pattern name or photo to access the pattern. Enjoy!


Crochet Owl Hat for Kids Free Pattern
These crochet owl hats are a hoot! I made so many of these when I was selling my crochet items, everyone loved them and you can use so many color combinations!


Crochet Snowman Hat for Kids
I love this snowman hat with the earmuffs! This pattern comes in ALL sizes newborn through adult so the whole family can have one!


Crochet Little Deer Hat Pattern for Kids
These crochet deer hats are just too adorable with two different face options.


Plaid Woodland Animal Crochet Hats for Kids
I love the plaid incorporated into these cute crochet animal hats! Kids will love these!


Crochet Shark Hat for Kids
Anyone else's kiddos obsessed with the baby shark song?! This hat would be perfect!


Crochet Unicorn Hat Pattern for Kids
Unicorn lovers need this. The pattern comes in all sizes so everyone can join in on the fun!


Gingerbread Man and Girl Crochet Hat Pattern for Kids
Cute little gingerbread boy and girl would be so cute for siblings!


Penguin Crochet Hat for Kids
Make this for a girl or boy with the two different face options!


Ninja Turtle Beanie for Kids Free Crochet Pattern
This hat is so creative and fun!


Crochet Llama Hat for Kids
The yarn used for this llama hat is perfect! So cute and cuddly!


Watermelon Crochet Hat Pattern for Kids
Watermelon, anyone? I love the little heart shaped stitches that act as watermelon seeds!


Crochet Pizza Hat for Kids
My son LOVES pizza and when he asked me to make him a pizza hat, I delivered! This hat comes in all sizes for the pizza lovers in your life.


Crochet Dinosaur Hat for Kids
What little boy doesn't want a dinosaur hat?! A simple hat with spikes - perfect!


Double Pom Pom Hat for Kids
These pom pom crochet hats are so much fun to make and wear! The color possibilities are endless. This pattern comes in ALL sizes newborn through adult.

Labels: ,

Crochet Velvet Cardigan Sweater - Free Pattern

Scroll down for the Free Crochet Pattern for the Velvet Cardigan Sweater.


The Crochet Velvet Cardigan has been a huge work in progress for the past month! My wonderful pattern testers did such a wonderful job and I'm so excited to share with you the final crochet pattern for this cardigan.

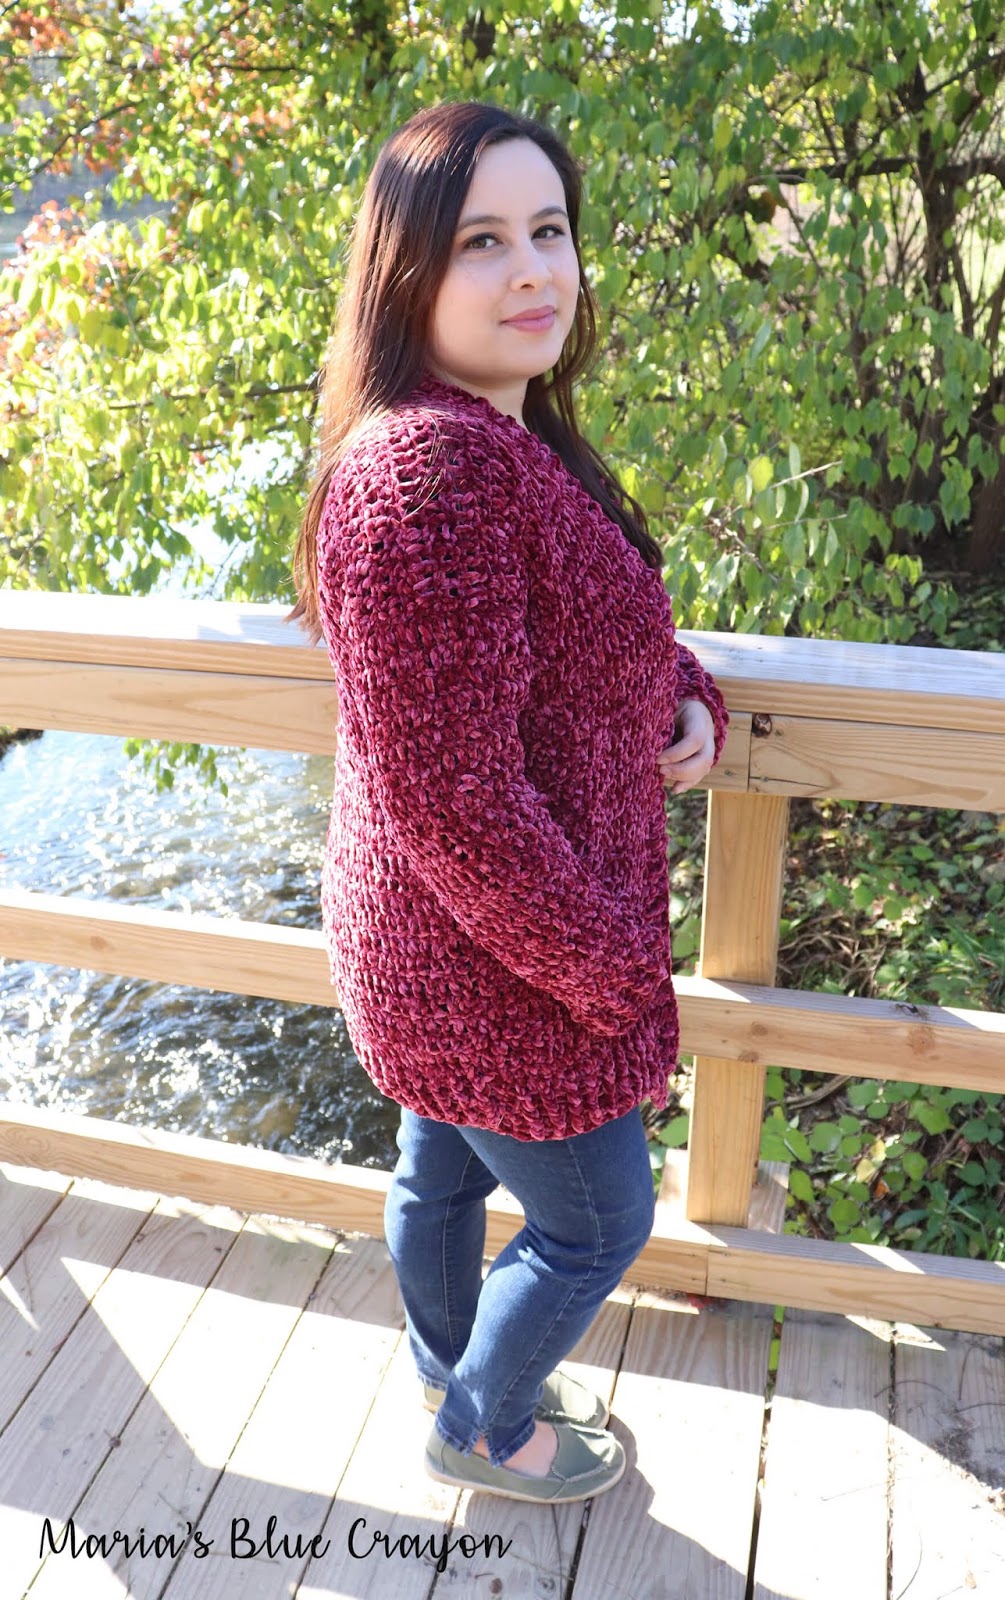
When I first picked up the Bernat Velvet yarn, I knew I wanted to wear it. This cardigan is everything I dreamed it would feel like and more! It's comfortably fitted and feels so soft against the skin, it's incredible.


The wonderful thing about this crochet velvet cardigan pattern is that it is easy to make and uses only basic stitches and construction. If you know how to double crochet, you know how to make this cardigan.

With the velvet yarn being a bulkier yarn, it also doesn't take much time to crochet this cardigan.  I would say in total, it took me 3-4 sittings to make this entire cardigan including the seaming. The yarn is so wonderful to work with, you won't want to put it down!


Something different I did this time around with pattern sizing for a cardigan is adding heights to the sizes. I'm 4'11" so I have always calculated the measurements to suit the average height person when writing the pattern. Well, I know from a lot of you that I'm not the only shorty out here!

You will see in the pattern that I have added instructions on whether you would like to make your cardigan "short, average, tall" in addition to the typical sizing (small, medium, etc). I know how frustrating it can be when you are not the average size so I hope this extra addition to the pattern is helpful for you!


One thing I have to caution you on this yarn is that it is very delicate. When you crochet with it, it is wonderful and frogging (ripping out your finished work) is no issue but when it comes to seaming you need to be careful not to seam too tightly.


I also added in the pattern notes that you may want to use stitch markers to assemble your pieces and try it on to make sure it fits well before moving onto the actual sewing. From experience, taking out sewn pieces results in the yarn coming apart and takes far too much time because it's difficult to see.

Another thing my pattern testers and I have noticed is that since the yarn is so smooth and has not much traction, it's easy for the double crochet stitches to become loose in areas. This will not result in your cardigan coming a part or effect the wear of your cardigan but you may notice small loops forming from the loose stitches. (If anyone has any advice on this - I'd love to know!)

Don't forget to give it a heart as well - thank you so much for your support!

Sharing in any way really helps my blog - thank you!

Free Crochet Pattern for the Velvet Cardigan


Materials

Bernat Velvet 2-3 skeins
2 skeins: XS (short - tall lengths), S (short - tall lengths), M (short length), L (short length) 
3 skeins: M (average - tall length), L (average - tall length), XL-3XL (short - tall lengths)
K/6.50mm hook
Tapestry needle
Scissors
Tape Measure

Pattern notes

The overall construction of the cardigan is as follows: You will begin crocheting the ribbing for the bottom of the back panel of the cardigan and then working the main body of the cardigan. You will continue to work to make the first front panel. You will attach yarn to the back panel to make the second front panel. Front panels will be folded down onto the back panel and sewn up sides leaving room for arm holes. Sleeves will be made separately, folded in half and sewn up the sides and onto the body of the cardigan. Edging will be crocheted around the front panels.

*It is helpful to use stitch markers to piece everything together before sewing just incase you need to adjust the garment to fit you. This yarn is not very forgiving when it comes to taking out sewn pieces.*

Sizes/Fit: This cardigan is comfortably fitted. The front panels will be fairly open and will not cover the entire bust for most sizes. The panels may seem not wide enough until you do the edging. You may add more edging if you’d like. If you are between sizes, I suggest going up a size. 

XS - 28-30” bust
S - 32-34” bust
M - 36-38” bust
L - 40-42” bust
XL - 44-46” bust
2X - 48-50” bust
3X - 52-54” bust

In addition to bust sizes, I have adjustments in the pattern for short, average, and tall heights. I have the cardigan pattern written out so it hits several inches below the hips, but you can make yours as long or as short as you’d like by reviewing the below how long each cardigan will be with height adjustments. You may also choose to make it shorter or longer by decreasing/adding rows for each panel made.
You will see these heights in parentheses when making the back and front panels.

5’2” and below - short (Cardigan will be roughly 28” in height.) 
5’3”-5’7” - average (Cardigan will be roughly 31” in height.)
5’8” and above - tall (Cardigan will be rougly 34” in height.)

Gauge: 4” x 4” ~ 9 st x 5 rows dc

Chain 3 in the beginning of each row DOES count as a stitch

Abbreviations (US terms):
Ch = chain, dc = double crochet, fpdc = front post double crochet, bpdc = back post double crochet, st = stitch(es)

Pattern

Ribbing

Row 1: Ch 38 (40, 42, 46, 48, 52, 56), dc in 4th ch from hook and across, turn (36,38,40,44,46,50,54)
Row 2: Ch 3, *fpdc, bpdc, repeat from * across, fpdc in last st, turn
Repeat Row 2 for 3 more rows

Main body/Back Panel

Row 6: Ch 3, dc across, turn
Repeat Row 6 for 32 (short), 36 (average), 40 (tall) more rows

This will complete the back panel, DO NOT fasten off. We will begin working on one of the front panels that will later be folded down onto the back panel.

Panel One worked off of main body

Row 1: Ch 3, dc into next 17 (18, 19, 21, 22, 24, 26) st, turn (18,19,20,22,23,25,27)
Row 2: Ch 3, dc across, turn
Repeat Row 2 for 30(short), 34 (average), 38(tall) more rows
Continue onto ribbing

Ribbing

Row 1: Ch 3, *fpdc, bpdc, repeat from * across, fpdc in last st if needed
Sizes XS, M, L Repeat Row 1 for 4 more rows
Sizes S, XL, 2X, 3X go to Row 2

Row 2: Ch 3, *bpdc, fpdc, repeat from * across
Sizes S, XL, 2X, 3X, repeat Row 1-2 until you have 5 rows of ribbing ending with Row 1

Fasten off

Panel Two

Attach yarn to main body on the opposite side of where the first panel begins. (Fig. 1)

Repeat instructions from panel one.


Contruction/Assembling Body of Cardigan

Fold panels down and sew up the sides leaving 6.5(7, 7.5, 8, 8.5, 9, 10) inches for each arm hole. (Fig. 2)

This will be the wrong side. Keep it wrong side out for now.


Sleeves

Row 1: Ch 32 (34, 36, 38, 40, 42, 44), dc into 4th ch from hook and across, turn (30,32,34,36,38,40,42)
Row 2: Ch 3, dc decrease, dc in remaining st, turn
Repeat Row 2 for 7(9,11,13,14,14,14) more rows
Ch 3, dc across, turn (22,22,22,22,23,25,27)
Repeat for 12(10, 8, 6, 5, 5, 5) more rows
*Note: If you need to add length to the sleeves, add more rows here. Sleeves are based on arms being ~18” long. Tall sizes may need more length.*
Ribbing
Row 1: Ch 3, *fpdc, bpdc, repeat from * across, fpdc in last st if needed
Sizes XS, S, M, L Repeat Row 1 for 4 more rows
Sizes XL, 2X, 3X go to Row 2

Row 2: Ch 3, *bpdc, fpdc, repeat from * across
Sizes XL, 2X, 3X repeat Row 1-2 until you have 5 rows of ribbing ending with Row 1


Fold in half and whip stitch up the side. This will be the wrong side. Keep it wrong side out. (Fig. 3)

Make 2 sleeves. Sew sleeves onto main body where holes were left for arms. Be sure not to sew too tightly with the velvet yarn. 
Turn inside out, this will now be the right side of your sweater.


Edging

Attach yarn to bottom corner of front panel.
Ch 3, dc evenly up the front panel and down the second front panel (2dc for each row of dc)
Ch 3, *fpdc, bpdc, repeat from * around, fpdc in last st if needed.
Fasten off and weave in ends.
*Note: You may add more edging as you’d like by repeating the last row.

Labels: , ,

Friday, November 16, 2018

Double Pom Pom Hat for Baby, Kids and Adults - Free Crochet Pattern

Scroll down for the free crochet pattern for the double pom pom crochet hat for baby, kids, and adults!

Pom Pom Hat

I have to say, this double pom pom hat may be one of the easiest hats you will ever make! You don't have to worry about shaping what so ever. It's basically a rectangular tube and pom poms! Super cute!

One thing I love about this super easy double pom pom crochet hat is that you can play around with the colors and make it so much fun for kids to wear! I went with cool muted tones for Trevor and I love how it came out!

Crochet Pom Pom Hat

For this crochet pom pom hat, I think the more colors the merrier! Another awesome thing about that is, you can use up a lot of your leftover worsted weight yarns! When making this hat, I only used leftover skeins and had plenty of yarn for it! Also, I think it's important to mention I made this hat in one sitting! Very quick AND easy.

The best part about this crochet hat? The pom poms! I think the pom poms are what makes this crochet hat so much fun! I incorporated all the colors I used for the hat and I didn't use a pom pom maker, I only used my hands to make the pom poms! They aren't perfectly lush and round but honestly, I think that's what makes them so cute and spunky.

Crochet Pom Pom Hat for Kids

I made these hats years ago when I use to make and sell my crochet items. I mainly targeted it for younger ages, but I think they are so fun to make for the whole family! So for this pattern, I have written up all the sizes newborn through adult so no one will get left out!

Crochet Pom Pom hat

This is toddler Trevor in the one I made for him many years ago. Wasn't he a cutie?! (Of course, he still is now!) And do you see what I mean about playing around with the colors? There are just so many possibilities for this double pom pom crochet hat.

I hope you enjoy playing around with the colors for these adorable double pom pom crochet hats! Please be sure to share with me your creations on my facebook group Maria's Yarn Friends. I would love to see 'em!

Thank you so much for supporting my work! I wouldn't be able to stay home and homeschool my munchkin otherwise!

Sharing my patterns in any way really helps my blog flourish - thank you so much!

Crochet Pom Pom Hat Pattern

Materials

Worsted weight yarn
I/5.5mm hook
Tapesty needle
Scissors
Pom pom maker (optional)

Pattern notes

Hat will be made in the round by crocheting a tube from the top down. The top will then be sewn up and pom poms will be attached to either side of the hat.

In the hat pictured, the yarn color was changed after each round. You may choose to make a solid color hat or wider stripes by changing colors less often after each round.

Beginning chains do not count as a stitch unless otherwise stated in the pattern.

Sizes are as follows (head circumference):
Newborn: 13” 
3-6 months: 14”
6-12 months: 16”
12-24 months: 17”
Toddler: 18”
Child: 20”
Adult: 21”

Gauge: 4”x4” = 14 st x 10 rows in hdc
*I tend to crochet loosely. Be sure to check your gauge so your hat comes out the size you want.

Abbreviations (US terms):
Ch = chain, hdc = half double crochet, dc = double crochet, bpdc = back post double crochet, fpdc = front post double crochet, st = stitch(es)

Pattern

Newborn

Round 1: Ch 39, join to first ch to form a loop
Round 2: Ch 2, hdc around, join to first hdc
Round 3-10 (8 rounds): Repeat Round 2
Round 11: Ch 2, dc around, join to first dc
Round 12-14 (3 rounds): Ch 2 (counts as st), *fpdc, bpdc, * repeat from * around, join to beginning ch 2
Fasten off. Continue on to assembly instructions below.

3-6 months

Round 1: Ch 42, join to first ch to form a loop
Round 2: Ch 2, hdc around, join to first hdc
Round 3-11 (9 rounds): Repeat Round 2
Round 12: Ch 2, dc around, join to first dc
Round 13-15 (3 rounds): Ch 2 (counts as st), *fpdc, bpdc repeat from * around, fpdc in last st, join to beginning ch 2
Fasten off. Continue on to assembly instructions.

6-12 months

Round 1: Ch 48, join to first ch to form a loop
Round 2: Ch 2, hdc around, join to first hdc
Round 3-12 (10 rounds): Repeat Round 2
Round 13: Ch 2, dc around, join to first dc
Round 14-16 (3 rounds): Ch 2 (counts as st), *fpdc, bpdc repeat from * around, fpdc in last st, join to beginning ch 2
Fasten off. Continue on to assembly instructions.

12-24 months

Round 1: Ch 52, join to first ch to form a loop
Round 2: Ch 2, hdc around, join to first hdc
Round 3-13 (11 rounds): Repeat Round 2
Round 14: Ch 2, dc around, join to first dc
Round 15-17 (3 rounds): Ch 2 (counts as st), *fpdc, bpdc repeat from * around, fpdc in last st join to beginning ch 2
Fasten off. Continue on to assembly instructions.

Toddler

Round 1: Ch 55, join to first ch to form a loop
Round 2: Ch 2, hdc around, join to first hdc
Round 3-14 (12 rounds): Repeat Round 2
Round 15: Ch 2, dc around, join to first dc
Round 16-18 (3 rounds): Ch 2 (counts as st), *fpdc, bpdc repeat from * around, join to beginning ch 2
Fasten off. Continue on to assembly instructions.

Child

Round 1: Ch 61, join to first ch to form a loop
Round 2: Ch 2, hdc around, join to first hdc
Round 3-16 (14 rounds): Repeat Round 2
Round 17: Ch 2, dc around, join to first dc
Round 18-20 (3 rounds): Ch 2 (counts as st), *fpdc, bpdc repeat from * around, join to beginning ch 2
Fasten off. Continue on to assembly instructions.

Adult

Round 1: Ch 65, join to first ch to form a loop
Round 2: Ch 2, hdc around, join to first hdc
Round 3-18 (16 rounds): Repeat Round 2
Round 19: Ch 2, dc around, join to first dc
Round 20-22 (3 rounds): Ch 2 (counts as st), *fpdc, bpdc repeat from * around, join to beginning ch 2
Fasten off. Continue on to assembly instructions.

Assembly

Once the crochet part is finished, you will need to sew up the top of the hat. The front and back post double crochets will act as  a brim which will be the bottom of the hat.


Sew up the top of the hat by first laying flat (I like to keep the seam at the back of the hat in the middle). Hold both sides together and with a tapestry needle and yarn, whip stitch along the top or using a crochet hook, slip stitch across the top. Weave in ends.


To make pom poms, hold 3 strands of yarn together and wrap over four fingers about 40 times. Take off fingers and carefully place on a flat surface. Cut ~10” of yarn and tie around the center. Cut the loops on the top and bottom. Trim any long pieces to shape the pom pom.
You may use a pom pom maker as well to do this.
Attach pom poms to both top corners of the hat. Weave in ends.

Labels: ,

Monday, November 12, 2018

Best Free Crochet Pattern In Stitches Link Up Party Week #23

The best free crochet pattern round-up this week includes a lot of fall and winter crochet patterns!


Find the links below for the best most popular free crochet patterns this week! Also, scroll down to see the newest free crochet patterns from the hosts - this week there is a lot of Christmas themed crochet patterns!

1. Woven Cowl by Winding Road Crochet
2. Puff Stitch Slouch by Love Life Yarn
3. Super Easy Chunky Ear Warmer by Stitching Together
4. Emma Crochet Dress by Winding Road Crochet
5. Team Spirit Cozy by Edyth Blayn

There are free crochet patterns being submitted by more talented crochet designers at the very bottom! Check out your favorites!

Find even more free crochet patterns in past week's link up parties here!

Every other Monday, you will find a round up of the Top 5 Best Free Crochet Patterns! Plus, we (the hosts) will be sharing our own latest free crochet patterns on our blog. Throughout the week, links will be added so be sure to keep an eye on what others have to share as well!

If you are a crochet blogger that has free patterns to share, this is a great party for you to get your work out there! Simply follow the instructions below to 'link up' your free crochet patterns each week. If you are in the top 5 (most clicked patterns), your pattern will be shared and promoted by all of the crochet bloggers hosting this party! You can find more details below.

I am hosting this link up party right here on Maria's Blue Crayon, as well as on, Nicki's Handmade Crafts, Naztazia, Salty Pearl Crochet and The Unraveled Mitten. We are really excited to start this link up party and hope you join along!

Be sure to check out our social media pages and follow us for more crochet patterns and inspiration!


Find the newest and free crochet patterns from the hosts at the links below!


Ready to join In Stitches - The Best Free Crochet Pattern Party?

Want to add your link? Please remember to link to your actual project URL and not your homepage URL, and use the name of your project or post, not your own name. Just click the blue “Add Link” button below!

Please visit at least one other link, you just might find a new favorite project! AND – your clicks are how we determine which projects to feature each week! Feel free to leave a comment at the pattern link to provide feedback and show support.

No Etsy stores, Facebook pages, giveaways, or other link parties. Just blog posts to your actual crochet patterns that are accessible for FREE!

If your project gets featured as a top link, please do not submit that same project to future parties. We want to party fair! :)

Now let's get this party started! Please remember that the links below are shown in random order and are not shown according to when they were submitted or how many votes they received so far.


Labels: ,

Sunday, November 11, 2018

Snowman with Earmuffs Crochet Hat - Free Crochet Pattern for All Sizes

Scroll down for the free snowman hat pattern in sizes newborn, 3-6 months, 12-18 months, toddler, child, and adult!


I've had this crochet snowman hat in my mind since last winter! With so many ideas in my head, I just couldn't get this crochet snowman hat out on in time last year.

I'm so glad I waited to make this hat because last year, I didn't have the idea to use Bernat blanket yarn for the main portion of the snowman hat. I love how squishy, plush and soft it is!

Another plus for using the Bernat blanket yarn is that this crochet snowman hat works up rather quickly! The yarn is very bulky so very few rows are needed for these hats as well.

Designing the Crochet Snowman Hat

I had to rework this crochet snowman hat a few times for a few reasons. At first, I made the hat one row shorter than usual so I could use the earmuffs portion as the earflaps.

It was a really good idea, but the hat just wasn't long enough to cover the back of my son's neck. I wanted this to be very warm so I pitched the idea of using the snowman's earmuffs as earflaps, added another row for the hat, and just sewed the muffs on a bit higher so they wouldn't hang down so low.


The crochet earmuffs still act as earflaps but not as pronounced as I first had it! I could have kept them lower as ear flaps but it looked a bit funny once the face was on because it looked like the snowman had very low "ears".

The earmuffs I crocheted a few different ways, but settled for a 2D design as it was the easiest and looked the best!


The face should have been easy, but I did switch around the placement several times as well as different sized buttons. It's the little things that make it just right! So I hope you love this crochet snowman hat as much as I do to make a few for your loved ones!

Thank you so much for your support!

Sharing in any way really helps my blog keep going - thank you so much!

Free Crochet Snowman Hat Pattern

Materials

Bernat Blanket in white
Worsetd weight yarn in black, orange, and color of your choice for ear muffs
N/9.00mm hook
H/5.00mm hook
3/4” buttons (2)
Tapestry needle
Scissors

Pattern notes

The hat will be made first, follow the instructions for the size you are making below then go onto the next section to make the ear muffs (there are different sizes for this as well). The ear muffs will be sewn on to the sides of the hat. The earmuff strap will then be crocheted on and the face embellished.

Beginning chains of each round/row does not count as a stitch.

Gauge: 4” x 4” ~ 8 st x 5 rows in half double crochet using Bernat Blanket

Abbreviations (US terms):
Ch = chain, sc = single crochet, hdc = half double crochet, st = stitch(es), dec = decrease

Pattern

Main Hat - Use 9.00mm hook and Bernat Blanket yarn in White

Newborn 13-14”

Round 1: Magic ring, ch 2, 10 hdc in ring, join to first hdc (10)
Round 2: Ch 2, 2hdc in each st around, join to first hdc (20)
Round 3: Ch 2, *hdc in next 2 st, 2hdc, repeat from * around, hdc in last 2 st, join to first hdc (26)
Round 4: Ch 2, *hdc in next 12 st, 2hdc, repeat from * around, join to first hdc (28)
Round 5-6: Ch 2, hdc around, join to first hdc (28)
Fasten off.

3-6 months 15”

Round 1: Magic ring, ch 2, 10 hdc in ring, join to first hdc (10)
Round 2: Ch 2, 2hdc in each st around, join to first hdc (20)
Round 3: Ch 2, *2hdc, hdc in next st, repeat from * around, join to first hdc (30)
Round 4-7: Ch 2, hdc around, join to first hdc (30)
Fasten off

6-12 months 17”

Round 1: Magic ring, ch 2, 10 hdc in ring, join to first hdc (10)
Round 2: Ch 2, 2hdc in each st around, join to first hdc (20)
Round 3: Ch 2, *2hdc, hdc in next st, repeat from * around, join to first hdc (30)
Round 4: Ch 2, *2hdc, hdc in next 6 st, repeat from * around, hdc in last 2 st, join to first hdc (34)
Round 5-8: Ch 2, hdc around, join to first hdc (34)

Toddler 18”

Row 1: Magic ring, ch 2, 10 hdc in ring, join to first hdc (10)
Row 2: Ch 2, 2hdc in each st around, join to first hdc (20)
Row 3: Ch 2, *2hdc, hdc in next st, repeat from * around, join to first hdc (30)
Row 4: Ch 2, *2hdc, hdc in next 4 st, repeat from * around, join to first hdc (36)
Row 5-9: Ch 2, hdc around, join to first hdc (36)

Child 20”

Row 1: Magic ring, ch 2, 10 hdc in ring, join to first hdc (10)
Row 2: Ch 2, 2hdc in each st around, join to first hdc (20)
Row 3: Ch 2, *2hdc, hdc in next st, repeat from * around, join to first hdc (30)
Row 4: Ch 2, *2hdc, hdc in next 2 st, repeat from * around, join to first hdc (40)
Row 5-10: Ch 2, hdc around, join to first hdc (40)

Adult 21”

Row 1: Magic ring, ch 2, 10 hdc in ring, join to first hdc (10)
Row 2: Ch 2, 2hdc in each st around, join to first hdc (20)
Row 3: Ch 2, *2hdc, hdc in next st, repeat from * around, join to first hdc (30)
Row 4: Ch 2, *2hdc, hdc in next 2 st, repeat from * around, join to first hdc (40)
Row 5: Ch 2, *2hdc, hdc in next 19 st, repeat from * around, join to first hdc (42)
Row  5-11: Ch 2, hdc around, join to first hdc (42)

Adult (men) 22”

Row 1: Magic ring, ch 2, 10 hdc in ring, join to first hdc (10)
Row 2: Ch 2, 2hdc in each st around, join to first hdc (20)
Row 3: Ch 2, *2hdc, hdc in next st, repeat from * around, join to first hdc (30)
Row 4: Ch 2, *2hdc, hdc in next 2 st, repeat from * around, join to first hdc (40)
Row 5: Ch 2, *2hdc, hdc in next 9 st, repeat from * around, join to first hdc (44)
Row  5-11: Ch 2, hdc around, join to first hdc (44)

Ear Muffs - Use 5.00mm hook and worsted weight yarn in color of choice

For sizes newborn and 3-6 months

Round 1: Magic ring, ch 2, 10 hdc in ring, join to first hdc (10)
Row 2: Ch 2, 2 hdc in each st around, join to first hdc (20)
Row 3: Ch 2, *2hdc, hdc in next st, join to first hdc (30)
Fasten off and leave tail end for sewing. Make 2.

For sizes 6-12 months through adult

Round 1: Magic ring, ch 2, 10 hdc in ring, join to first hdc (10)
Row 2: Ch 2, 2 hdc in each st around, join to first hdc (20)
Row 3: Ch 2, *2hdc, hdc in next st, join to first hdc (30)
Row 4: Ch 2, *2hdc, hdc in next 2 st, join to first hdc (40)
Fasten off and leave tail end for sewing. Make 2

Assembly

With tapestry needle, sew the ear muffs onto each side of the hat around 3-4 rows up from the bottom.

Using black yarn and 5.00mm hook, attach yarn onto the top of one ear muff and follow the directions below for the size you are making.
*See photos below*

Newborn and 3-6months
Ch 1, sc in next 3 st, turn
Ch 1, sc across, turn
Repeat until the strap is long enough to go over the hat and reach the top of the other earmuff. Sew onto second earmuff.

6-12 months through Adult
Ch 1, sc in next 4 st, turn
Ch 1, sc across, turn
Repeat until the strap is long enough to go over the hat and reach the top of the other earmuff. Sew onto second earmuff.

Nose - Use 5.00mm hook and orange worsted weight yarn
Ch 5, sc in 2nd ch from hook and across, turn (4)
Ch 1, sc dec, sc dec, turn (2)
Ch 1, sc dec, fasten off (1)
Sew onto hat.

Eyes
Sew on button eyes.

Attach black yarn to top of ear muff and make the amount of single crochets needed depending on size, making sure it is relatively centered. 
Continue to crochet the strap.

Once the strap is long enough to reach the top of the second ear muff on the other side, sew on with tapestry needle. Reinforcing the strap by sewing it onto hat can be done as well but not necessary.

Labels: ,