Add next in . Do NOT use www. for the new_domain Maria's Blue Crayon

Tuesday, September 18, 2018

Velvet Circle Pillow - Free Crochet Home Decor Pattern

GET THE FREE PDF DOWNLOAD FOR THE CROCHET VELVET CIRCLE PILLOW BELOW.


Let me start by saying - velvet yarn is thee yarn you will want to snuggle up in and never part with.

It's funny because the first time I came into contact with it, I didn't give it a second look over. I think it was Yarn Bee from Hobby Lobby where I saw it first. I just didn't have any ideas of what to do with it and walked on by.


Fast forward to this past weekend when I found the Bernat Velvet at Michael's and I'm obsessed. They come in big 315 yard skeins in various beautiful colors. They immediately reminded me of the velvet dresses I wore as a kid in the 90s. Burgundy, deep purple, navy, and teal green - plus they have pretty neutrals!

I originally wanted the burgundy but my store was out of them (thank goodness for online shopping!), so being the impatient person I am I picked up the Sandy Cream which is such a pretty neutral.

I worked up a swatch and knew I had to make a pillow - the softest, comfiest, and squishiest pillow!


I loved working with this yarn so much, I finished this project in one day (I even sewed a pillow form for it because I didn't want to wait to get one in stores!). I immediately started working up another pattern after finishing this one too! I just love how it works up and how soft it is.


This velvet yarn has got me sold. I have so many more projects I want to make with it! I just want to live in this yarn, it's that good.

Stay tuned for more projects using this velvety yarn goodness! You can sign up for my email list so you don't miss out. :) SIGN UP FOR MY EMAIL LIST HERE.

FREE PATTERN PDF DOWNLOAD HERE.
PLEASE SHARE ANY WAY YOU CAN - GIVE IT A HEART ON RAVELRY, SHARE ON PINTEREST AND FACEBOOK -  IT HELPS MY BLOG GOING AND THE FREE PATTERNS COMING!
PIN IT TO YOUR CROCHET BOARDS ON PINTEREST.


Free Crochet Pattern

Materials

1 skein Bernat Velvet (Sandy Cream)
J/6.00mm hook
18” diameter circle pillow form
Tapestry needle
Scissors

Pattern notes

Beginning chain does not count as a stitch.

The pillow will be made by crocheting two separate circles and then joined around the pillow form.

Dimensions: 18” diameter

Gauge: 4”x4” ~ 10 st x 4 rows in double crochet

Abbreviations (US terms):
Ch = chain, dc = double crochet, st = stitch(es)

Pattern

Round 1: Magic ring, ch 2, 12 dc in ring, join to first dc
Round 2: Ch 2, 2dc in each st around, join to first dc
Round 3: Ch 2, *dc, 2dc, repeat from * around, join to first dc
Round 4: Ch 2, *dc in next 2 st, 2dc, repeat from * around, join to first dc
Round 5: Ch 2, *dc in next 3 st, 2dc, repeat from * around, join to first dc
Round 6: Ch 2, *dc in next 4 st, 2dc, repeat from * around, join to first dc
Round 7: Ch 2, *dc in next 5 st, 2dc, repeat from * around, join to first dc
Round 8: Ch 2, *dc in next 6 st, 2dc, repeat from * around, join to first dc
Round 9: Ch 2, *dc in next 7 st, 2dc, repeat from * around, join to first dc
Round 10: Ch 2, *dc in next 8 st, 2dc, repeat from * around, join to first dc
Round 11: Ch 2, *dc in next 9 st, 2dc, repeat from * around, join to first dc
Round 12: Ch 2, *dc in next 10 st, 2dc, repeat from * around, join to first dc
Fasten off.

Assembly
Make two circles, do not fasten off after second circle. Assembly
With the wrong sides facing together, single crochet the circles together. 
Stop a little over 1/2 way around to put in the pillow form.
Continue to single crochet around both circles to close it up.
Join to first single crochet, fasten off, and weave in ends.

Labels: , ,

Thursday, August 30, 2018

Chunky Crochet and Knit Pumpkins - Free Patterns

GET THE FREE PDF PATTERN DOWNLOAD FOR THESE CHUNKY KNIT AND CROCHET PUMPKINS BELOW.


These chunky knit and crochet pumpkins are so squishy and adorable! Topped with a delicious smelling cinnamon stick, they are the perfect fall decor for your home! 

Because I used a super bulky yarn, they were so quick to make! To be honest, I usually have a hard time finding unique patterns using super bulky yarn so I thought I would make these pumpkins to use up some super bulky yarn I had. 


The pumpkin that is a grayish blue color is knit and the oatmeal tweed pumpkin is crochet. The knit pumpkin is just a simple knit stitch in the round. I learned how to knit last year and although I love it, I don't knit as much as I'd like to so I thought it would be fun to make two different versions of pumpkins. Win win for the knitter, crocheter, and the bistitchual!


The crochet version uses the knit stitch (also called the waist coat stitch). I love the way the knit stitch looks, but to be perfectly honest I do find knitting it more enjoyable!

The knit stitch/waist coat stitch can become rather tight. If you're a tight crocheter, I suggest trying your best to crochet as loosely as possible. You'll find a quick video on how to make the knit stitch below.


These pumpkins are already set as a centerpiece in my house and I love it! My puppy even loves it so much, he managed to eat part of the cinnamon stick stem. I should have known - he was eyeing them up when I was setting them out to take photos!

I hope you enjoy making these pumpkins as much as I did! Please share with me over on Facebook
and Instagram!


PIN IT TO YOU CROCHET/FALL BOARDS ON PINTEREST.

DOWNLOAD THE FREE AD-FREE PDF.


Materials
Lion Brand Hometown USA (super bulky yarn)
P/11.50mm hook (for crochet)
9.0mm 16” circular needles (for knit)
Poly-fil Stuffing
Cinnamon Sticks and twine for stem
Tapestry and Scissors

Pattern notes
The pumpkin will be made by working in the round then sewn and cinched up at the top and bottom to create the sphere. We will additionally add grooves to the side with yarn and needle.

Adjusting Pumpkin size: If you would like to make multiple pumpkins in different sizes, simply add or subtract the number of beginning stitches/cast on stitches as well as the number of rows. I suggest adding/subtracting in multiples of 10 for the beginning stitches and adding/subtracting in multiples of 2-3 for the number of rows.

Beginning Chain 2 does not count as a stitch. (crochet)

Special stitches: knit stitch/waistcoat stitch (crochet)

You may need to use the magic loop method as the stitches will be quite stretched around the circular needles. (knit)

Abbreviations (US terms):
Ch = chain, sc = single crochet, st = stitch(es), k1 = knit one

Dimensions:
Crochet pumpkin - 7” in diameter
Knit pumpkin - 5” in diameter

Crochet Pattern

Round 1: Ch 27, join to first ch
Round 2: Ch 1, sc around, join to first sc
Round 3-15: Ch 1, knit stitch in each st around, join to first st
Fasten off and leave long tail (~3ft, more if you are making a larger pumpkin). Follow assembly instructions.
Add cinnamon stick and twine for stem.

Knit Pattern

Round 1: Cast on 30 st
Round 2-18: K1 in each st around
Bind off and leave long tail (~3ft, more if you are making a larger pumpkin).  Follow assembly instructions.
Add cinnamon stick and twine for stem.

The assembly instructions are the same as my Lil Dollop Pumpkins - learn how to assemble your pumpkins here.

Labels: , , ,

Tuesday, August 21, 2018

Lil Dollop Pumpkins - Free Crochet Pattern

Get ready for Fall with these Lil Dollop Crochet Pumpkins! 
(Each sale helps my blog running and helps support my family, thank you!)
OR Scroll down for the free pattern


I'm a big fan of the fall season, so I'm really excited to share these crochet pumpkins with you!

I was at Hobby Lobby the other week and I saw the cutest little cakes of yarn called "Lil Dollop" by Yarn Bee.  They came in adorable colors and I knew instantly they would be perfect for pumpkins!


They aren't the traditional pumpkin colors, but I think that's what makes it so fun! I made them in three different sizes so they could be arranged together.

The 'largest' pumpkin uses almost the entire skein, so it's the perfect project for these little skeins! The others are a tad smaller and will not use the entire skein but will use most of it.


These crochet pumpkins are quick to make and has a subtle texture that makes these pumpkins so adorable! Paired with the color changing yarn, they are extra cute!

If you would like traditional colored pumpkins or if you want your pumpkin a solid color, feel free to use any worsted weight yarn you would like! You can also use bulkier sized yarns (adjust hook size as needed) to make larger pumpkins. Play around with the sizes and have fun!

Fabric pumpkins seem to be really in at the moment and I love it! Place these on your mantle, as a center piece, side tables, or coffee table for a touch of fall in your home!

I think they even look really cute stacked up on top of each other! You can either secure them stacked up with a bit of hot glue or if you'd like the option of keeping them together or separate, attach them with a bit of yarn to stay together. When you want to free them for a different look, just snip the yarn!


Materials
1 skein Yarn Bee Lil Dollop (Applessence, Watermelon Whisper, Midnight Truffle - 92yards each)
Small amount dark brown worsted weight yarn for stem
G/4.00mm hook
Poly-fil stuffing
Tapestry needle
Scissors

Pattern notes
The pumpkin will be made by working in the round then sewn and cinched up at the top and bottom to create the sphere. We will additionally add grooves to the side with yarn and needle.

Beginning Chain 2 does not count as a stitch.

We will be working in the round as well as turning our work after each round. Note that when we turn our work, the first stitch we will be working into is as shown in photo. We will always work into that single crochet from the previous row. (This DOES NOT apply to the first round 2 as we have no turned yet, in that case we will work into that very first stitch).


Abbreviations (US terms):

Ch = chain, sc = single crochet, dc = double crochet, st = stitch(es)

Free Crochet Pattern


Small: 4” diameter x 3” high
Round 1: Ch 30, join to first ch careful not to twist
Round 2: Ch 2, *dc, sc, repeat from * around, join to first dc, TURN (30)
Repeat round 2 until you have a total of 16 rows
Fasten off and leave a very long tail (~3-4 ft) and follow the assembly instructions below.


Medium: 5” diameter x 4” high
Round 1: Ch 50, join to first ch careful not to twist
Round 2: Ch 2, *dc, sc, repeat from * around, join to first dc, TURN (50)
Repeat round 2 until you have a total of 20 rows
Fasten off and leave a very long tail (~3-4 ft) and follow the assembly instructions below.


Large: 5” diameter x 5” high
Round 1: Ch 50, join to first ch careful not to twist
Round 2: Ch 2, *dc, sc, repeat from * around, join to first dc, TURN (50)
Repeat round 2 until you have a total of 25 rows
Fasten off and leave a very long tail (~3-4 ft) and follow the assembly instructions below.

Stem - use dark brown yarn
Round 1: Magic ring, ch 1, 4sc in ring, join to first sc
Round 2: Ch 1, 2sc in each st around, join to first sc
Round 3-5: Ch 1, sc around, join to first sc. Fasten off and sew onto top of pumpkin.

Assembly Instructions


1. This is what your work will look like after fastening off.


2. Use a separate piece of yarn to sew the bottom up. Weave in and out of the bottom stitches all the way around.


3. Pull tight and tie yarn ends together. Hide them on the inside of the pumpkin.


4. Stuff with poly-fil.


5. Use the long tail to weave in and out of the top stitches of the pumpkin.


6. Pull tight to cinch together and add more poly-fil as needed. Don’t worry if there is a small hole you can’t close, this will be covered by the stem.

Knot the yarn, do not cut off.


7. Take the yarn tail and insert into the bottom of the pumpkin with needle. We will now be making the grooves around the pumpkin.


8. Pull the needle up through the center to the top of the pumpkin. Pull tight (enough to make an indentation to form the grooves). Continue to make equal sectioned grooves by inserting the needle into the bottom and up through the top. I did this 6 times for a total of 7 sections/bumps. Knot and weave in ends.


Labels: , ,

Tuesday, July 31, 2018

Stained Glass Pillow Cover - Free Granny Square Crochet Pattern

Find the Stained Glass Crochet Pillow Cover ad-free PDF on Ravelry (each purchase helps my blog going and my family fed - thank you so much!)

OR Scroll down for the free pattern.


I'm granny square crazy! I can't even count how many different squares I've made.. but this may be my new favorite twist on the granny square!

I'm a sucker for texture so when I swatched up a sample of the bead stitch, I knew I had to make it into a granny square!


Although this stitch is gorgeous, making it in the round in a granny square makes it a bit wonky. The stitch counts and the overall shape is there.. but it needs major blocking if you want to make it as a blanket!

Since I wanted to skip the blocking, I decided to fold it up into a pillow cover without having to block it. Seaming up the sides took care of the kinks!

You can make this granny square as large or as small as you'd like. I had a 16" pillow insert so I chose to make it to fit the pillow. It's very easy to adjust the size as needed, it's just a repeat of the same row! 


MORE FREE CROCHET PATTERNS YOU WILL LOVE!


For this Stained Glass Pillow Cover I used Caron cotton cakes - one of my favorite yarns to work with! I often find color changing cakes a challenge to work with because of the interruption of color changes in the least flattering places, but it works so well with this pattern! 

You can see the color changes in the pillow but you don't see (or easily notice) the abrupt color changes in this pattern. I think it makes such a cool visual pattern with the radiating color and all the texture!


SAVE IT FOR LATER


Pillow Cover Crochet Pattern

Materials

3 skeins Caron Cotton Cakes (Rose Whisper)
H/5.00mm hook
Pillow insert (16” shown)
Tapestry needle & Scissors

Pattern notes

If you will be making this as a afghan, you will need to block once finished.

Special stitch: Bead stitch is worked as follows: dc, *insert hook behind dc just worked (see photo), pull up a loop, repeat from * two more times, YO, pull through 5 loops on hook, YO, pull through last two loops.

Abbreviations (US terms):
Ch = chain, dc = double crochet, st = stitch(es), sl st = slip stitch, sp = space, sk = skip

Pattern

Round 1: Magic ring, Ch 3, dc, ch 3, *4dc, ch 3, repeat from * twice, 2dc, join to first ch 3, sl st into next st and into ch 3 sp
Round 2: (Ch 3, dc, ch 3, 2dc) in ch 3 sp from previous round, [*bead st, sk 1, repeat from * across, (2dc, ch 3, 2dc) in ch 3 sp from previous round] repeat 2 times, *bead st, sk 1, repeat from * across, join to beginning ch 3, sl st into next st and into ch 3 sp from previous row 
Repeat Round 2 until the diagonal measurement of the square (from one corner to the opposite corner) equals the size of your pillow insert.

Pillow Cover Assembly


Lay the pillow insert as pictured. Make sure the corner of the granny squares touch each other when folded inwards onto the pillow. If it is too small/large you will need to make more/take out rows.


Fold corners into each other and sew up the edges. Weave in ends.

Labels: , , , ,

Thursday, July 19, 2018

Hoooked Zpagetti Yarn Review PLUS Free Crochet Rug Pattern

If you've never used t-shirt yarn before, you gotta try it! I got to try the popular Hoooked Zpagetti yarn from Love Crochet and it's fantastic! I'm going to tell you all about it plus there is a free downloadable crochet pattern at the end for the rug I made with it!


So let's start with the details of the Hoooked Zpagetti yarn.

Hoooked Zpagetti Yarn Details

  • 90% recycled cotton, 10% other recycled fibers
  • 131 yards per skeins
  • Super Bulky yarn
  • Care instructions: Hand wash and lay flat to dry
  • Find it at LoveCrochet.com

First Impressions

This is a lot of yarn! Although each skein is 131 yards, it's super bulky so you get a good amount! 

I was also pleasantly surprised at the softness of the cotton. If I were to cut up one of my t-shirts, I don't think it would be as soft as this recycled cotton yarn. 

One thing I did notice about the yarn when I was working with it is that the thickness was not consistent throughout, specifically the white color I used. (The dark gray color I used was consistent throughout). It did not effect the outcome of my project, but it's just something that caught my eye when I was using it.

Crochet Pattern

This t-shirt style yarn is perfect for rugs, so I made a simple rug with striping! I will be using them for my bathroom and I'm already loving how thick and sturdy it feels under my feet.


I went with a really simple stitch except I mixed it up just a bit. I used the moss stitch (also known as linen stitch and many other names) but instead of doing the traditional single crochet with this stitch, I swapped it for half double crochets for a looser stitch (plus it works up much more quickly!).


My puppy has already partially claimed it.. his favorite spot to snooze during the day is in the bathroom (although I find it a rather odd spot to sleep) so he will be using it a lot!

Since this pattern is so easy, I'm offering the ad-free PDF printable/downloadable for free to everyone.

DOWNLOAD THE FREE PDF PATTERN HERE

Enjoy!


Labels: , , ,

Thursday, May 10, 2018

Crochet Dog Bowl Mat - Free Pattern and Knit Picks Dishie Yarn Review

With spring here and summer months coming ahead, cotton yarns are my go to for crocheting!  I wanted to try out the Dishie Yarn from Knit Picks, and to sum it up - it's great! Read ahead for the review as well as a free PDF pattern for a dog mat that I made for our new puppy.


When I decided to try the Dishie cotton yarn from Knit Picks, I wanted to make something that most people will use this yarn for - dish cloths.

I whipped up a super simple dish cloth that I could use for a few weeks and throw in the washer/dryer to get a good feel for how this yarn would hold up. I must say - it's fabulous!


Knit Picks Dishie Cotton Yarn Review

I'll first give you the details of this yarn:

  • 100% cotton
  • Worsted weight
  • 190 yards/100 grams per skin
  • 29 colors to choose from
  • Machine washable
  • $2.99 per skein on KnitPicks.com (you can often find sales on the site)


I can't say I've worked with too many cotton yarns in my day, but the two other cotton yarns I have worked with quite often are Lily's Sugar n' Cream and Hobby Lobby's I Love This Cotton!

I would say Knit Picks Dishie yarn is somewhere in the middle. It's not quite as thick as the Sugar n' Cream and it is a bit softer and more pleasing to work with. 

Compared to Hobby Lobby's I Love This Cotton!, it's not as soft and doesn't have that finished shine to it. It definitely has more of a 'raw cotton' feel to it. I would definitely choose I Love This Cotton! for a garment versus the Dishie yarn, but I think the dishie yarn is suppose to be more practical for dish cloths anyway - hence the name "dishie"!

One of my favorite things about this yarn is that it comes in vibrant colors (29 beautiful colors, to be exact!) and they don't bleed! I remember using a very vibrant, variegated Lily Sugar n' Cream and it stained my hands while working with it. It wasn't very nice to work with.

As you can see, I chose a vibrant teal color to try out and it did not bleed and held up well through the washer and dryer! 

I used this wash cloth for 3 weeks in my kitchen. Personally, I don't use it to wash my dishes. I use dish cloths to clean my counter tops and stove when I'm cleaning up in the kitchen every evening. I then wash it out in the sink and throw it in the laundry every time I am doing laundry (which is about every 3 days or so).

I have to say, through all the washing and cleaning, it's held up great! No fuzzing or pilling. Even the color has held up! A lot of my dish cloths I have made from other cotton yarns have faded in color after the first or second wash but the color on the Dishie yarn is really stickin' it out!

I give this yarn two thumbs up, especially for wash cloths. I definitely recommend trying out the Dishie Cotton yarn from Knit Picks! You can buy some here.

Free Dog Bowl Mat Crochet Pattern


If you haven't heard, we recently got a new puppy! I knew I wanted to make him something, so I made a cute little dog mat for his food and water bowls! (I also made a basket for his toys - you can find that free pattern here.)


This is a really easy pattern and you can easily adjust it to the size you need, if you need a larger mat! You could also make it larger and use it as a rug/door mat if you'd like!


Materials:
Dishie Cotton Yarn in Kenai, Jalapeno, and Silver
H/5.00mm hook
J/6.00mm hook
Tapestry needle
Scissors

Notes:
Color A = Kenai (teal), Color B = Jalapeno (green), Color C = Silver

Abbreviations (US terms)
Ch = chain, sc = single crochet, hdc = half double crochet, dc = double crochet

Start with Color A and H/5.00mm hook
Row 1: Ch 44, hdc in 3rd chain from hook and across, turn
Row 2: Ch 1, hdc across, turn
Repeat Row 2, changing between Color A & B every 6 rows

Attach Color C and single crochet evenly around the edge, making 3 single crochet in each corner.
Fasten off and weave in ends.

Paw Applique

Using Color C and J/6.00mm hook

Magic ring, 10hdc in ring, join to first hdc
Ch 2, *dc, 2dc, repeat 3 more times
Fasten off and leave tail for sewing

That completes the main portion of the paw.

For the 4 little circles work the following with Color C and H/5.00mm hook:

Magic ring, 6sc, join to first sc
Fasten off and leave tail for sewing

Make 4 little circles.

Sew paw print onto mat in bottom right corner.

Labels: , , ,

Wednesday, April 18, 2018

Caron Cotton Cakes Basket - Free Crochet Pattern

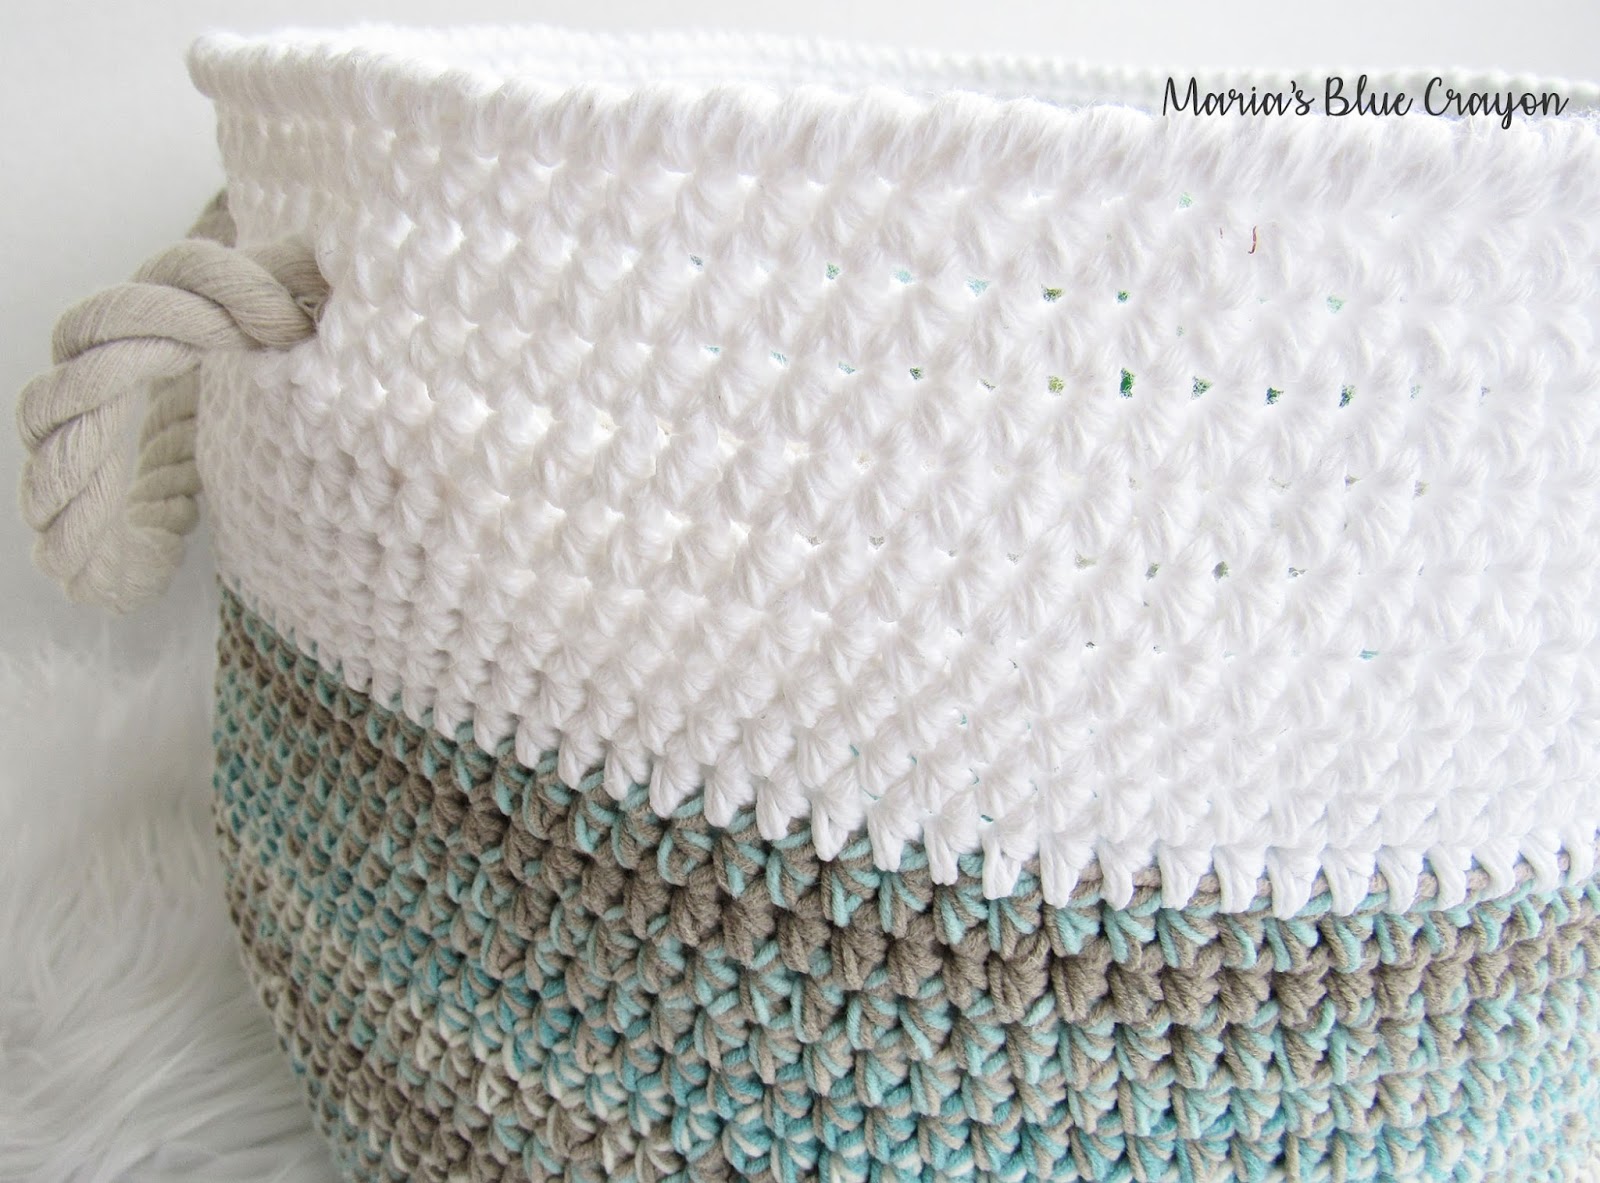
Caron Cotton Cakes are one of my favorite yarns to work with, and this crochet basket is super easy to make! Find the free pattern below!


Caron Cotton Cakes are anticipated to come back to Michael's Stores this April (2018). I haven't seen any sightings just yet, but we are nearing the end of April so I'm sure they will be on the shelves any day now!

I used the Caron Cotton Cakes in Beach Glass from last summer when they were newly released. I love the blue and gray combination and I love how it worked up double stranded!


As you can see, I made this basket for the newest addition to our family! A cockapoo named Milo, who is now 9 weeks old. I have already started to crochet all the things for this little pup! This basket is for all of his toys and extra blankets.


I had a limited number of skeins to work with for the Caron Cotton Cakes, so I had to add a different cotton yarn to the top. It seemed to work out in my favor, because I love the block of white on the top - perfect to add his name! 

Of course, you can leave it blank or stitch on another word such as "yarn", "toys", your child's name, etc. I didn't do anything fancy for the stitching, just a running stitch. Surface crochet was proven too difficult for me, but that could totally work too!


I used a crab stitch for the very top of the basket, and I think it makes such a nice finishing touch! Along with the rope handles, I think this basket looks pretty legit! The rope handles are optional, but I like to move my baskets often so they will be very useful for me.


After crocheting the basket, it did not stay up on its own.  It kind of just fell over on itself although I doubled up the yarn throughout. I did have to stiffen the fabric, which I dreaded doing.. but it was easier than I thought it would be and it turned out great!

There are many different ways of doing this, but I used water and white glue. Cheap and easy. I'll have tutorial coming up on just how I stiffened this basket to stand up! Although it holds the shape, it is still flexible as you can see when Milo digs into his toys. :)


Are you making this for later?


Pattern

Materials
4 skeins Caron Cakes (Beach Glass)
1 skein I Love this Cotton! (white)
Yarn to sew on name/word (optional)
J/6.00mm hook
1 yard of rope for handles (I got mine at Joann Fabric's)
Tapestry needle
Scissors

Notes

The basket will be made by holding two strands of yarn together throughout. 

*When making the base of the basket, I kept increasing each round until it got wavy. When the circle become ruffled, I added a round of even stitches (no increasing), then continued to increase. The pattern is a bit 'uneven', if you will, but if you come to a point where your circle is completely ruffled, you may need to add more rows with no increases.

Crab stitch: Single crochet into the previous stitch, going the opposite direction you normally would crochet.

Abbreviations (US terms)
Ch = chain, hdc = half double crochet, st = stitch(es), sk = skip

Gauge: 13 st x 10 rows in hdc

Dimensions: 9.5 inches in height, 13 inches in diameter

Start by holding two strands of Caron Cotton Cakes together

Round 1: Magic ring, Ch 2, 12 hdc in ring, join to first hdc
Round 2: Ch 2, 2hdc in each st around, join to first hdc
Round 3: Ch 2, *2hdc, hdc, repeat from * around, join to first hdc
Round 4: Ch 2, *2hdc, hdc in next 2 st, repeat from * around, join to first hdc
Round 5: Ch 2, *2hdc, hdc in next 3 st, repeat from * around, join to first hdc
Round 6: Ch 2, *2hdc, hdc in next 4 st, repeat from * around, join to first hdc
Round 7: Ch 2, hdc in each st around, join to first hdc
Round 8: Ch 2, *2hdc, hdc in next 5 st, repeat from * around, join to first hdc
Round 9: Ch 2, hdc in each st around, join to first hdc
Round 10: Ch 2, *2hdc, hdc in next 6 st, repeat from * around, join to first hdc
Round 11: Ch 2, hdc in each st around, join to first hdc
Round 12: Ch 2, *2hdc, hdc in next 7 st, repeat from * around, join to first hdc
Round 13: Ch 2, hdc in each st around, join to first hdc
Round 14: Ch 2, *2hdc, hdc in next 8 st, repeat from * around, join to first hdc
Round 15: Ch 2, hdc in back loops only in each st around, join to first hdc
Round 16-29: Ch 2, hdc in each st around, join to first hdc

Change to white yarn, holding two strands together

Round 30-35: Ch 2, hdc in each st around, join to first hdc
Round 36: Ch 2, *hdc into next 55 st, ch 3, sk 3, hdc into next 14 st, ch 3, sk 3, repeat from *, join to first hdc
Round 37: Ch 2, hdc into each stitch around, making 3 hdc into previous ch 3 spaces, join to first hdc
Round 38:Ch 2, hdc in each st around, join to first hdc
Round 39: Ch 1, crab stitch all the way around, join to first st
Fasten off

Attach rope handles by taking a piece of rope and inserting them in the holes on the top of the basket. Knot the rope on the inside of the basket.

Stiffen basket. Sew on word/name (optional).

There are several methods to stiffening fabric. I will have a tutorial on exactly how I stiffened this basket!


We hope you had a pawesome time making your basket!

If you are making it for later, PIN it to your boards or save it to your Ravelry for safe keeping!

Labels: , , ,