Add next in . Do NOT use www. for the new_domain Maria's Blue Crayon

Friday, March 1, 2019

Cardigan Shrug Free Crochet Pattern

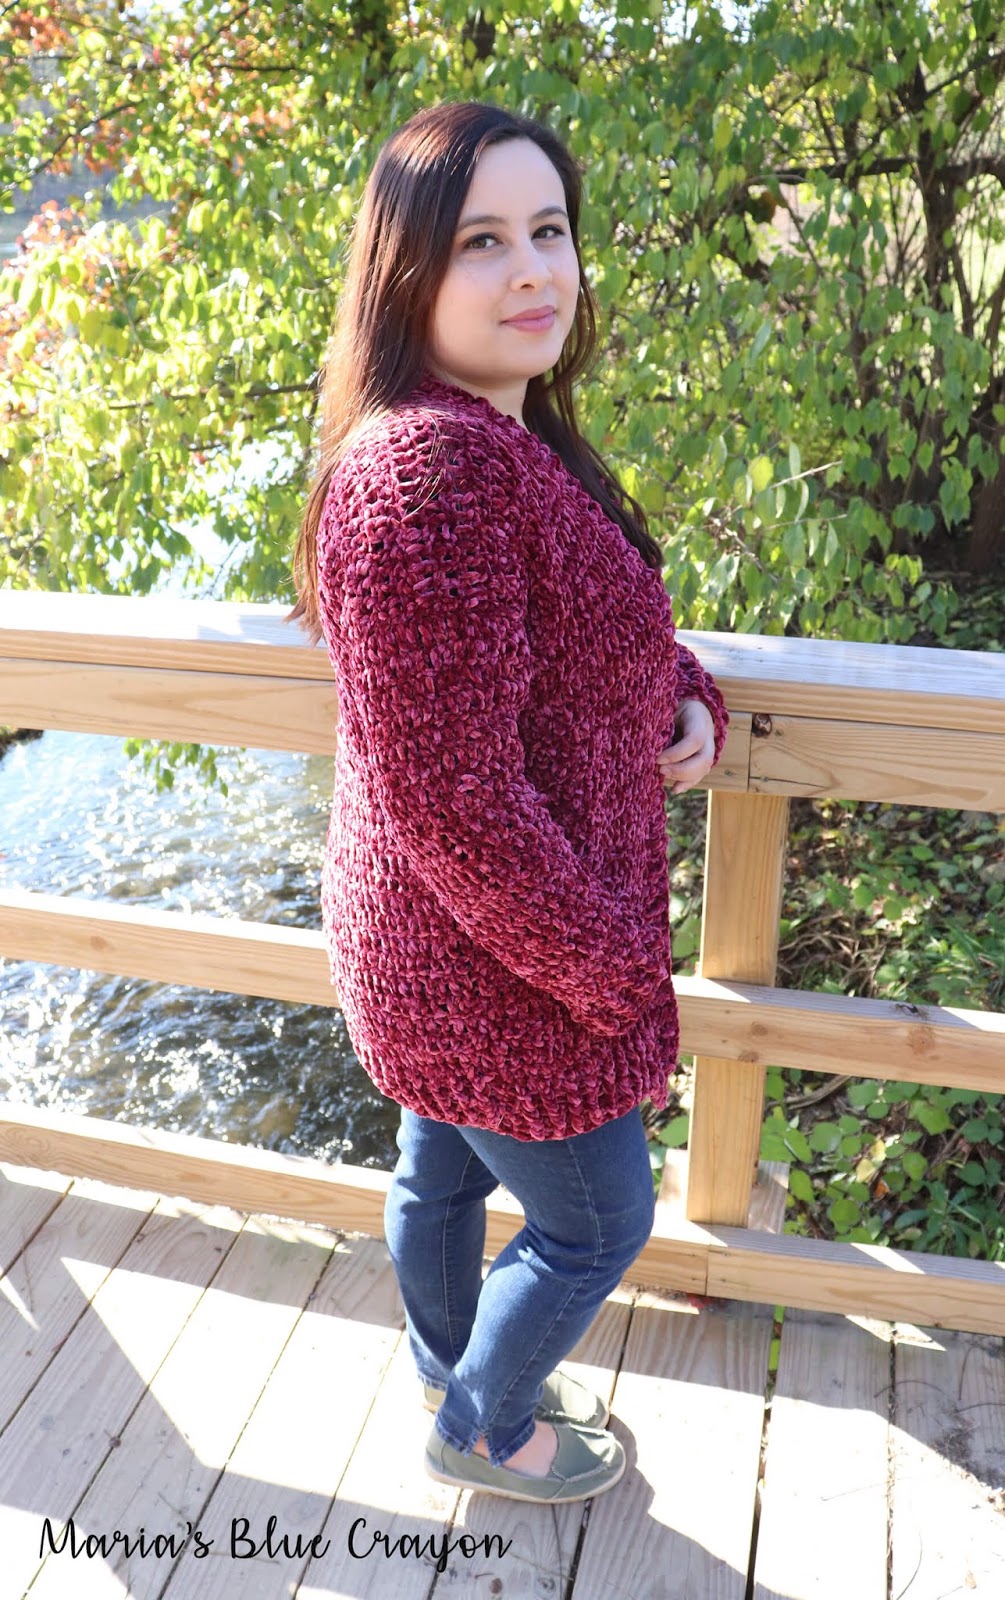
Make the crochet cardigan shrug with this free crochet pattern! Sizes Small - 3XL and additional length sizes Petite - Tall.
Keep scrolling for the pattern!


The Design

When I dreamed up this design, I wanted something comfortable to wear around the house but something I could also grab and go out the door for a quick errand.

I love the ease of shrugs, but I'm not always a fan of the 'arm wing' that comes with it. I know that isn't a technical term, but if you've ever worn a shrug - you know what I mean!

So for this design, I wanted the body to be like a shrug to have that oval drape in the front panels but I wanted 'normal' sleeves so I could reach over my desk while working without feeling limited in my reach.


The body of the cardigan is a regular fit and super cozy.  The extra collar and ribbing that wraps around the entire cardigan gives you an extra cozy element and creates a great added texture!

I wanted to add subtle texture throughout the cardigan to make it stand out in a simple way, so I used a few different stitches for each component of the cardigan.


To add a different texture, I veered away from horizontal rows. Instead, the panels of the cardigan are made in vertical rows - you can see the vertical rows clearly in the back of the cardigan.  

I also used a herringbone stitch for the body of the cardigan and then completed the sleeves and ribbing with basic double crochets.


The Yarn

My previous cardigans were made from either worsted weight or bulky yarns. I wanted to go out of my comfort zone and use a lighter weight yarn.

I ultimately decided on using Knit Picks Brava Sport in Cream. It is a weight 2 100% acrylic yarn.  I heard it was a nice yarn to work with and washes up nicely.

Since I knew this cardigan would have some weight to it with the extra collar/ribbing along with the herringbone stitch, I thought it would be a good idea to use a light weight yarn so it wouldn't weigh me down while worn.


For a crochet cardigan, it is pretty light weight. It is even lighter than my Heartland Cardi that is shorter in size and uses only double crochets.

It did take a bit more time for this cardigan to come together because of the weight of the yarn, but I'm telling you - it was worth it!


Since the yarn I used is an online only yarn, I know you may be hesitant to purchase it. Personally, I love it! And I ordered several more skeins in gray and wine (more garment patterns coming soon!)

However, if you are more comfortable getting a yarn you are able to get in stores - I get it! I would recommend finding a sport weight yarn. Typically, many baby yarns are in the lighter weight categories.

If you shop at Hobby Lobby, they have a yarn called "Baby Bee Sweet Delight" and although it is a baby yarn, it comes in several beautiful neutral shades. I used the one of the gray colors for my Ruffle Cardigan that you can get the free pattern for here.

What ever yarn you choose, just be sure to check your gauge! I lay out everything you need to know about gauging and how to do it here in this post. It takes a few minutes, but will ensure your cardigan will come out the right size!

Sizes

There are a total of 18 different sizes for this crochet pattern! I know, that sounds like way too many sizes, but it's true!

The 'normal' sizing/bust sizing is there - S,M,L,XL,2X,3X. PLUS I've added sizes for height - Petite, Average, Tall. So if you need a Small Tall, it's all in the pattern. If you need a XL petite, it's all laid out for you! 

Being a shorty (4'10") I know how frustrating it can be to only find clothing that doesn't fit correctly.  Plus, I'm a size large so a lot of the things I try on in the store are by default too long.  

Crocheting your own garment should be custom fit to your body so I've thrown in ALL the sizes! 
This cardigan is meant to fit you perfectly so you can cozy up in it, I hope you find your perfect size that I've provided.


Please PIN this to your crochet boards to share it with all your friends! Grab a copy of the PDF if you like the convenience of being able to download/print - it also supports my blog and keeps the patterns coming!


Cardigan Shrug Free Crochet Pattern

  • Get the ad-free printable PDF on Ravelry or Etsy.
  • Save this pattern to your Ravelry.
  • PIN it on your Crochet Pinterest board for later.
Materials
(100% Acrylic 273yds/100g) Cream
H/5.00mm hook
Tapestry needle
Stitch Markers
Scissors

Level Easy

4” x 4” = 15 st x 11 rows in herringbone dc
4” x 4” = 17 st x 8 rows in dc

Abbreviations (US terms):
Ch = chain, dc = double crochet, dc2tog = double crochet 2 together, st(s) = stitch(es)

Special Stitch

Herringbone double crochet - Yarn over, insert hook in stitch, yarn over, pull up a loop, pull through one loop on hook, yarn over, pull through one loop, yarn over, pull through two loops on hook. 

Sizes

Size
Fits Bust
Finished Width
Finished Length (Petite/Average/Tall)
Yardage Estimate in skeins (Petite/Average/Tall)
Small 32-34” 18” 24.5”/ 27.5”/ 30.5” 5 / 5 / 6
Medium 36-38” 19” 24.5”/ 27.5”/ 30.5” 5 / 6 / 6
Large 40-42” 20” 24.5”/ 27.5”/ 30.5” 6 / 6 / 7
XLarge 44-46” 21” 24.5”/ 27.5”/ 30.5” 7 / 7 / 7
2X 48-50” 22” 24.5”/ 27.5”/ 30.5” 7  / 7 / 8
3X 52-54” 23” 24.5”/ 27.5”/ 30.5” 7 / 7 / 8


Size Notes

Top and side of collar will be folded down and not accounted for in measurements.
Petite fits sizes 5’2” and below /
Average fits sizes 5’3” - 5’7” /
Tall sizes fits 5’8” and above

There are a total of 18 sizes to choose from when making this cardigan. First choose size according to bust and then choose size according to height. Example: Large Petite.

Beginning chain determines the length of the garment and will be written in Petite/Average/Tall numbers. Row 2 repeats create the width of the garment and will be written for sizes S (M, L, XL, 2X, 3X).


Pattern notes

This cardigan is made in 4 pieces: 1 back panel, 2 front panels, and collar/ribbing. Sleeves will be crocheted on last.

Once the panels are completed, the rows will lay vertically when assembling the pieces together.

When seaming and attaching the components together, the mattress stitch method is recommended. Find a video tutorial for the mattress stitch here.

I have two different gauges listed as my tension was different for the two different stitches used in the pattern. Please check gauge to ensure your project comes out the size you want.

Beginning chain counts as a stitch when stated in the pattern, otherwise the beginning chain does not count as a stitch.

Beginning chain determines the length of the garment and will be written in Petite/Average/Tall numbers. Row 2 repeats create the width of the garment and will be written for sizes S (M, L, XL, 2X, 3X).

Pattern

Back Panel

Row 1: Ch 77/88/100 herringbone dc into the 4th ch from hook and each ch across, turn <75/86/98>
Row 2: Ch 3 (counts as st), herringbone dc into next st and each st across, turn <75/86/98>
Repeat Row 2 until you have a total of 49 (52, 55, 58, 61, 64) rows.
Fasten off and weave in ends.

Front Panel (Make 2)

Row 1: Ch 77/88/100 herringbone dc into 3rd ch from hook and each ch across, turn <75/86/98 sts>
Row 2: Ch 3 (counts as st), herringbone dc into next st and each st across, turn <75/86/98 sts>
Repeat Row 2 until you have a total of 8 (10,11,12,14,15) rows

We will begin to decrease at the beginning and end of each row. Each row will be two less sts than the previous row.

Decrease Row: Ch 3 (counts as a st), dc2tog, herringbone dc across until last 2 sts, dc2tog over last 2 sts, turn <73/84/96 sts>
Repeat the decrease row for 14 more rows for all sizes. <45/56/68 sts>
Fasten off and weave in ends.
Make 2 front panels.

Collar/Ribbing

Row 1: Ch 22, dc in 3rd ch from hook and across, turn (20)

Row 2: Ch 2, dc across, turn (20)
Repeat row 2 until you have the total number of rows listed in the chart below according to the size you are making.

Row 3: Ch 2, dc across until last st, 2dc in last st, turn (22)

Row 4: Ch 2, 2dc in the next 2 st, dc across in remaining st, turn (24)
Repeat rows 3 and 4 until you have a total of 40 st across

Repeat row 2 for 26 rows (40)

Row 5: Ch 2, dc2tog twice over the next 4 st, dc across in remaining st, turn (38)

Row 6: Ch 2, dc across until last 4 st, dc2tog twice over last 4 st, turn (36)
Repeat rows 5 and 6 until you have 20 st across 

Repeat row 2 for a total number of rows listed in the chart according to the size you are making.
Fasten off.
 Seam the first and last row together using the mattress stitch.


Collar/Ribbing Repeats of Row 2

Petite
Average
Tall
Small
64
70
76
Medium
66
72
78
Large
68
74
80
XLarge
70
76
82
2X
72
78
84
3X
74
80
86

Assembly

Lay the back panel flat. The herringbone stitch will create a “v” pattern, you may decide if you want the “v” pointing up or down.
Lay the front panels on top of the back panel, making sure the “v” pattern is going the same direction.
Use stitch markers to pin together the front panels. Pin along the top shoulder areas and down the sides leaving a 7 (7.5, 8, 8.5, 9, 9.5) inch opening for arm holes on each side.

Using the mattress stitch, seam up the top shoulder area and sides leaving the arm holes open.


Pin the collar/ribbing onto the edging of the cardigan. Where the collar/ribbing increases/decreases, you will be able to fit that onto the top front panel like a puzzle piece. You can start at the top front panel, working your way around the neck line, around and down the second panel, around the back, and back up the first panel. Pin around carefully, making sure not to stretch the collar/ribbing too much while pinning. 

Using the mattress stitch, seam together the collar/ribbing to the main body of the cardigan. Weave in any ends.


Sleeves

Attach yarn to armpit area of one arm hole opening on main body of cardigan. 
Round 1: Ch 2, dc around the arm hole evenly making one dc in each stitch around, join to first dc, turn
Round 2: Ch 2, dc around until last 2 sts, dc2tog over last 2 st, join to first dc, turn
Repeat Round 2 until you have a total of 29 (30, 32, 34, 35, 35) rows
For sizes 2X-3X, fasten off and weave in ends.
For sizes S-XL, repeat Round 1 for an additional 6 (5, 3) rounds.

Each sleeve for all sizes will have a total of 35 rounds.

You may add/subtract rows here if you need extra/less length.
Fasten off and weave in ends.

Repeat these steps for the second sleeve.

More Free Patterns You Will Love


Labels:

Sunday, November 18, 2018

Crochet Velvet Cardigan Sweater - Free Pattern

Scroll down for the Free Crochet Pattern for the Velvet Cardigan Sweater.


The Crochet Velvet Cardigan has been a huge work in progress for the past month! My wonderful pattern testers did such a wonderful job and I'm so excited to share with you the final crochet pattern for this cardigan.

When I first picked up the Bernat Velvet yarn, I knew I wanted to wear it. This cardigan is everything I dreamed it would feel like and more! It's comfortably fitted and feels so soft against the skin, it's incredible.


The wonderful thing about this crochet velvet cardigan pattern is that it is easy to make and uses only basic stitches and construction. If you know how to double crochet, you know how to make this cardigan.

With the velvet yarn being a bulkier yarn, it also doesn't take much time to crochet this cardigan.  I would say in total, it took me 3-4 sittings to make this entire cardigan including the seaming. The yarn is so wonderful to work with, you won't want to put it down!


Something different I did this time around with pattern sizing for a cardigan is adding heights to the sizes. I'm 4'11" so I have always calculated the measurements to suit the average height person when writing the pattern. Well, I know from a lot of you that I'm not the only shorty out here!

You will see in the pattern that I have added instructions on whether you would like to make your cardigan "short, average, tall" in addition to the typical sizing (small, medium, etc). I know how frustrating it can be when you are not the average size so I hope this extra addition to the pattern is helpful for you!


One thing I have to caution you on this yarn is that it is very delicate. When you crochet with it, it is wonderful and frogging (ripping out your finished work) is no issue but when it comes to seaming you need to be careful not to seam too tightly.


I also added in the pattern notes that you may want to use stitch markers to assemble your pieces and try it on to make sure it fits well before moving onto the actual sewing. From experience, taking out sewn pieces results in the yarn coming apart and takes far too much time because it's difficult to see.

Another thing my pattern testers and I have noticed is that since the yarn is so smooth and has not much traction, it's easy for the double crochet stitches to become loose in areas. This will not result in your cardigan coming a part or effect the wear of your cardigan but you may notice small loops forming from the loose stitches. (If anyone has any advice on this - I'd love to know!)

Don't forget to give it a heart as well - thank you so much for your support!

Sharing in any way really helps my blog - thank you!

Free Crochet Pattern for the Velvet Cardigan


Materials

Bernat Velvet 2-3 skeins
2 skeins: XS (short - tall lengths), S (short - tall lengths), M (short length), L (short length) 
3 skeins: M (average - tall length), L (average - tall length), XL-3XL (short - tall lengths)
K/6.50mm hook
Tapestry needle
Scissors
Tape Measure

Pattern notes

The overall construction of the cardigan is as follows: You will begin crocheting the ribbing for the bottom of the back panel of the cardigan and then working the main body of the cardigan. You will continue to work to make the first front panel. You will attach yarn to the back panel to make the second front panel. Front panels will be folded down onto the back panel and sewn up sides leaving room for arm holes. Sleeves will be made separately, folded in half and sewn up the sides and onto the body of the cardigan. Edging will be crocheted around the front panels.

*It is helpful to use stitch markers to piece everything together before sewing just incase you need to adjust the garment to fit you. This yarn is not very forgiving when it comes to taking out sewn pieces.*

Sizes/Fit: This cardigan is comfortably fitted. The front panels will be fairly open and will not cover the entire bust for most sizes. The panels may seem not wide enough until you do the edging. You may add more edging if you’d like. If you are between sizes, I suggest going up a size. 

XS - 28-30” bust
S - 32-34” bust
M - 36-38” bust
L - 40-42” bust
XL - 44-46” bust
2X - 48-50” bust
3X - 52-54” bust

In addition to bust sizes, I have adjustments in the pattern for short, average, and tall heights. I have the cardigan pattern written out so it hits several inches below the hips, but you can make yours as long or as short as you’d like by reviewing the below how long each cardigan will be with height adjustments. You may also choose to make it shorter or longer by decreasing/adding rows for each panel made.
You will see these heights in parentheses when making the back and front panels.

5’2” and below - short (Cardigan will be roughly 28” in height.) 
5’3”-5’7” - average (Cardigan will be roughly 31” in height.)
5’8” and above - tall (Cardigan will be rougly 34” in height.)

Gauge: 4” x 4” ~ 9 st x 5 rows dc

Chain 3 in the beginning of each row DOES count as a stitch

Abbreviations (US terms):
Ch = chain, dc = double crochet, fpdc = front post double crochet, bpdc = back post double crochet, st = stitch(es)

Pattern

Ribbing

Row 1: Ch 38 (40, 42, 46, 48, 52, 56), dc in 4th ch from hook and across, turn (36,38,40,44,46,50,54)
Row 2: Ch 3, *fpdc, bpdc, repeat from * across, fpdc in last st, turn
Repeat Row 2 for 3 more rows

Main body/Back Panel

Row 6: Ch 3, dc across, turn
Repeat Row 6 for 32 (short), 36 (average), 40 (tall) more rows

This will complete the back panel, DO NOT fasten off. We will begin working on one of the front panels that will later be folded down onto the back panel.

Panel One worked off of main body

Row 1: Ch 3, dc into next 17 (18, 19, 21, 22, 24, 26) st, turn (18,19,20,22,23,25,27)
Row 2: Ch 3, dc across, turn
Repeat Row 2 for 30(short), 34 (average), 38(tall) more rows
Continue onto ribbing

Ribbing

Row 1: Ch 3, *fpdc, bpdc, repeat from * across, fpdc in last st if needed
Sizes XS, M, L Repeat Row 1 for 4 more rows
Sizes S, XL, 2X, 3X go to Row 2

Row 2: Ch 3, *bpdc, fpdc, repeat from * across
Sizes S, XL, 2X, 3X, repeat Row 1-2 until you have 5 rows of ribbing ending with Row 1

Fasten off

Panel Two

Attach yarn to main body on the opposite side of where the first panel begins. (Fig. 1)

Repeat instructions from panel one.


Contruction/Assembling Body of Cardigan

Fold panels down and sew up the sides leaving 6.5(7, 7.5, 8, 8.5, 9, 10) inches for each arm hole. (Fig. 2)

This will be the wrong side. Keep it wrong side out for now.


Sleeves

Row 1: Ch 32 (34, 36, 38, 40, 42, 44), dc into 4th ch from hook and across, turn (30,32,34,36,38,40,42)
Row 2: Ch 3, dc decrease, dc in remaining st, turn
Repeat Row 2 for 7(9,11,13,14,14,14) more rows
Ch 3, dc across, turn (22,22,22,22,23,25,27)
Repeat for 12(10, 8, 6, 5, 5, 5) more rows
*Note: If you need to add length to the sleeves, add more rows here. Sleeves are based on arms being ~18” long. Tall sizes may need more length.*
Ribbing
Row 1: Ch 3, *fpdc, bpdc, repeat from * across, fpdc in last st if needed
Sizes XS, S, M, L Repeat Row 1 for 4 more rows
Sizes XL, 2X, 3X go to Row 2

Row 2: Ch 3, *bpdc, fpdc, repeat from * across
Sizes XL, 2X, 3X repeat Row 1-2 until you have 5 rows of ribbing ending with Row 1


Fold in half and whip stitch up the side. This will be the wrong side. Keep it wrong side out. (Fig. 3)

Make 2 sleeves. Sew sleeves onto main body where holes were left for arms. Be sure not to sew too tightly with the velvet yarn. 
Turn inside out, this will now be the right side of your sweater.


Edging

Attach yarn to bottom corner of front panel.
Ch 3, dc evenly up the front panel and down the second front panel (2dc for each row of dc)
Ch 3, *fpdc, bpdc, repeat from * around, fpdc in last st if needed.
Fasten off and weave in ends.
*Note: You may add more edging as you’d like by repeating the last row.

Labels: , ,

Monday, September 10, 2018

Crochet Striped Raglan Sweater - Free Pattern

Purchase the ad-free PDF pattern for the Crochet Striped Raglan Sweater for you convenience here!
OR Find the Striped Raglan Sweater crochet pattern for free below! 


This Raglan Sweater is definitely a staple for your closet now that fall is approaching! It's a basic sweater that fits your form and has a fun stripe detail (or you can leave it out if you just want a pretty sweater all in one color!)

I worked so hard on this design for you guys and I'm so happy that I'm finally releasing it out in the world! The actual crocheting part was a breeze - I couldn't believe how easy a raglan style sweater crochets up! And fairly quickly too.


With no sewing or seaming, this sweater is crocheted completely in ONE PIECE! No sewing the arm sleeves together or on the body. No seaming up the body pieces. The only time you will need your yarn needle is to weave in a few ends. You will love the construction of it because of this!

Although the Raglan Sweater was so easy to crochet (I finished it in about 2-3 sittings) - boy was it a handful to tackle the math to write down the pattern! I wanted to make it as easy and clear as possible, so I did lots of math for the stitch counts. I apologize in advance because this pattern comes in limited sizes (XS - XL). Like I said, the math was a beast and more than I could take on!


A thing to note about size is, I made it to be form fitting. I am actually wearing a size smaller than what the pattern indicates I should have made. With my original size guide, a lot of my pattern testers found it to be too snug so I moved up all the sizes and added one for the XLarge. I would typically wear a large but since I moved the sizes, I am actually wearing a medium. You can see that it is very snug, especially around the bust so if you follow the sizes guideline in the pattern, don't worry it should not be THAT snug on you.

I used Lion Brand's Heartland yarn which is soft and stretchy and helps make the sweater comfortable. I highly recommend using this yarn when making this sweater! One of my testers also used Caron Simply Soft which is similar and could be used as a yarn substitute as well.


You may also notice when doing the striping, that in my photos I have less stripes. I wrote the pattern catered to an average height person. Being 4'10", I adjusted my pattern to be a bit shorter. If you are a shorty like me, you can simply leave off a row of stripes!

And of course, if you are taller, feel free to add more stripes or just add more length at the bottom.

The nice thing about raglan style sweaters is that you can try them on as you go. You can easily adjust the length of both the body and sleeves by simply adding on rows after you have tried the sweater on for size. 


(Thank you so much! Your support helps my blog going!)


Materials List
Lion Brand Heartland Yarn
3-4 skeins main color, 1 skein contrast color
J/6.00mm hook
Tapetry needle/Scissors

Pattern Notes

Sweater will be made in a top down fashion.

Sweater is made to be a bit form fitting. If you are in between sizes, I suggest going up a size.

Beginning chains of each row do not count as a stitch.

Gauge: 4” x 4” ~ 12 st x 8 rows in double crochet

Abbreviations (US terms)
Ch = chain, sc = single crochet, dc = double crochet, sp = space, sk = skip, st = stitch(es)

Bust sizes (inches)
XSmall: 28 - 30
Small: 32-34
Medium: 36-38
Large: 40-42
XLarge: 44-46

Start with main color
Round 1: Make 70 (72,76,76,80) sc foundation chains, join to first sc
Round 2: Ch 2, dc in next 11(11,13,13,14) st, (2dc, ch 1, 2dc) in next st, dc in next 10(10,9,10,9) st, (2dc, ch 1, 2dc) in next st, dc in next 23(24,27,26,29) st, (2dc, ch 1, 2dc) in next st, dc in next 10(10,9,10,9) st, (2dc, ch 1, 2dc) in next st, dc in remaining 12(13,14,13,14) st, join to first dc
Row 3: Ch 2, *dc until you reach ch 1 sp from previous row, (2dc, ch 1, 2dc) in ch 1 sp, repeat from * around, dc in remaining st, join to first dc

Repeat Row 3 5(6,7,8,9) more times.
Each round will grow by 16 st.
Do no fasten off

Sectioning off arm holes

Ch 2, dc until ch 1 sp, sl st ch 1 sp to next ch 1 sp, dc across to next ch 1 sp, sl st ch 1 sp to next ch 1 sp, dc in remaining st, join to first dc

You will now have three sections - two arm holes and one body.
Do not fasten off, continue to work the body. We will start decreasing to shape the body. Each row will be decreased by 6st.

Round 1: Ch 2, dc in next 23(25,29,30,32) st, dc2tog 3 times, dc in next 44(52,58,62,64) st, dc2tog 3 times, dc in remaining st, join to first dc
Round 2: Ch 2, dc in next 21(24,28,29,30) st, dc2tog 3 times, dc in next 42(48,54,58,62) st, dc2tog 3 times, dc in remaining st, join to first dc
Round 3: Ch 2, dc in next 20(23,26,27,29) st, dc2tog 3 times, dc in next 38(44,52,56,58) st, dc2tog 3 times, dc in remaining st, join to first dc
Round 4: Ch 2, dc in next 18(21,25,26,27) st, dc2tog 3 times, dc in next 36(42,48,52,56) st, dc2tog 3 times, dc in remaining st, join to first dc
Round 5: Ch 2, dc in next 17(20,23,24,26) st, dc2tog 3 times, dc in next 32(38,46,50,52) st, dc2tog 3 times, dc in remaining st, join to first dc
Proceed to Round 7 for XSmall & Small Sizes
Round 6: Ch 2, dc in next 22(23,24) st, dc2tog 3 times, dc in next 42(46,50) st, dc2tog 3 times, dc in remaining st, join to first dc
Round 7-9: Ch 2, dc around, join to first dc
*Change to contrasting color
Ch 2, dc around, join to first dc
Change to main color
Ch 2, dc around, join to first dc

Repeat from * 8 more times

Ch 2, dc around, join to first dc 6(6,8,8) more times (with main color)
(At this point, you can try on your sweater and make it longer as needed) Fasten off.

The body of your sweater is now complete.

Sleeves

Attach yarn to armpit of arm hole (each st will be worked in, including the ch 1 spaces that were attached)
Round 1: Ch 2, dc2tog, dc until 2 st, dc2tog, join to first dc
Repeat Round 1: 8 times
Round 9-34: Ch 2, dc around, join to first dc
(At this point, you can try on your sweater and make your sleeve longer if needed or shorter by taking off some rows.)
Fasten off. Repeat on second arm hole.

Labels: ,