Add next in . Do NOT use www. for the new_domain Maria's Blue Crayon: December 2016

Tuesday, December 27, 2016

Giraffe Tissue Box Cover


I'm going to be honest, I hated the idea of tissue box covers when I first discovered they were a thing.  I found them as equally displeasing as a crocheted toilet seat cover.  Fast forward a few months, and I thought, 'Hey, these could be really fun for kids if I transformed it a little!' 


I thought it would be a thoughtful gift for my son's classroom, so I started brainstorming what I could transform a plain tissue box cover into. The theme of my son's classroom is "jungle", so I definitely wanted to make a cute little animal.  A giraffe was my pick because I knew I would be able to add on a bunch of little details that would really make it special! 
(Fun fact: Giraffes don't actually live in the jungle, but if you google jungle theme, you are bound to see a giraffe so I just went with it!!)


And since it's cold/flu season - why not make it a bit more bearable by dressing up your tissue boxes!?  I'm going to share with you how I made the base of my tissue box as well as all the add ons to make it into a giraffe! The possibilities are endless here.  You can make what ever animal, character, or object you want!


Materials:
Loops & Threads Impeccable yarn in gold, brown, tan, white, and black
Poly-fil (can substitute cotton balls/yarn scraps)
Crochet hook sizes H and F (you may need a different size depending on your gauge)
Tapestry needle
Scissors
Square tissue box

My Amazon Picks: (affiliate links)


I was able to find a free pattern on Ravelry for the base of my tissue box cover. There are three different "styles" to choose from, I used the basic pattern here (follow the pattern for the red box). 
Before you start please, please, please check your gauge! The pattern maker used a G hook, but I had to use an H hook to obtain proper measurements as well as adding a few rows at the end to fit my tissue box. My mom (who is a fairly tight crocheter) used a J hook to obtain the measurements. So please check your gauge, it's important for this project in order to have a snug fit over the tissue box!

For the giraffes face, I used parts of Repeat Crafter Me's giraffe hat pattern, and also made some modifications as I went. You can see how I made the horns, ears, and snout over on her site here.
*As you can see, I made 'X' stitches for the nostrils instead of circles. It's up to you how you want your giraffe to look!

What's left? The eyes and the spots. Again, you can follow Repeat Crafter Me's pattern of how she made the spots and eyes for her hat, but I will also show you how I made mine.

Eyes 
The eyes will be done in two parts, make two of each

Using H hook and white yarn, start with a magic circle
Chain 1 and 7 SC into the circle, join to first SC
Chain 1, 2 SC, 1 HDC, 2 DC, 1 HDC, 2SC, join to first SC
Fasten off and leave tail for sewing

Using F hook and black yarn, start with magic circle
Chain 1, 7 SC, join to first SC
Fasten off and leave tail for sewing

Sew each black part onto the white part to form the eyes. 

Spots
I made two different types of spots to mimic the giraffe's spots. Make two of each style.

Circular spot
Using H hook and brown yarn, start with a magic circle
Chain 1, 10 HDC in circle, join to first HDC
Chain 1, *HDC in next two stitches, 3 HDC in one stitch, repeat from * then join to first HDC
Fasten off and leave tail for sewing

Oval spot
Using H hook and brown yarn, start with magic circle
Chain 5, SC into second chain from hook
SC across the chain and continue to SC on the other side of the chain
(at this point, you should have 4 SC on each side of the chain totaling 8 SC)
Join to the first SC to complete the round
Chain 1, 3 SC in first stitch, SC in next two stitches, 3 SC in next two stitches, SC in next two stitches, 3 SC in last stitch, join to first SC
Fasten off and leave tail for sewing

Now all that is left is to sew on all the pieces! I usually sew pieces on as they are finished so I'm not left with a bunch of sewing left at the end, but to each their own! 

As you can see, I took ideas from different resources and made it my own! What will you come up with? I really would love to hear and see what you create! 
Please comment below, I would love to hear from you!

Want to save this for later? Don't forget to PIN IT to your Pinterest boards! 
Want to see what I'm up to? Follow me @mariasbluecrayon on Instagram!
Want more patterns? Like me on Facebook, I'm always sharing free patterns I find!

Labels: , ,

Monday, December 26, 2016

Quick Crochet Messy Bun Hat - Free Crochet Pattern


I think the whole concept of the messy bun hat is, you don't have time to wear your hair down so you throw it up, put on your hat, and get out the door! It makes you look like you made an effort, but in reality the hat does all the work. If you don't have time to get all dolled up to leave the house, chances are you don't have too much time to whip up a hat either.. SO of course, I had to make a very quick and easy tutorial on how to get one of these babies done in a short amount of time. This took me well under an hour using chunky yarn, and I'm super stoked that it only took one skein (technically two for the hat shown with two colors)!


Okay, here we go!


Materials

I used 1 skein Bernat Chunky(gray) and Loops and Threads Charisma(off white), you only need one skein if you are making it one color
N/9.00mm hook
Scissors
Tapestry needle


Pattern Notes

We will be starting with the brim of the hat and working our way up.

Chain in beginning of rounds do not count as stitch

Abbreviations (US terms):
Ch = chain, sc = single crochet, dc = double crochet


Brim of Hat

Ch 9, sc into the second chain from the hook and sc across (8)
Ch 1, turn your work and sc across (8)
Continue doing this until you have 35 rows. 

(At this point, you have made the brim of the hat. You can wrap this piece around your head to see if it will fit. I had to stretch it a few inches, but you will want to do this as the hat may stretch over time and plus, it will give you a snug fit. If you find the brim too small, add a few more rows until you find the perfect fit for you.)

Body of Hat

Once you have the brim finished, fold it in half so you can slip stitch the ends together. We will now begin working in arounds on the side of the single crochet rows we just made for the brim. Change colors here if you'd like.

Row 1: Ch 1, and sc around the brim, join to first sc (1 sc for each row, just try to keep the stitches evenly spaced. Don't worry if you don't think you're doing it perfectly, just go with it. So for this row I had 35 SC around.)

Row 2: Ch 1, sc all around, join to first sc

Row 3: Ch 2, *skip next stitch, dc into next stitch, dc into stitch that was skipped (this makes the double crochets look like an X.) , repeat from * around, join to first dc

(If you made more rows for your brim and have an extra stitch, dc in that last stitch.) 

Row 4: Ch 1, sc all around, join to first sc

Row 5: Repeat row 3

Row 6: Ch 1, *1 sc in the next 3 stitches, sc decrease. Repeat from * until you get to the last stitch, sc in last stitch (29)

Row 7: Repeat row 3

Row 8: Ch 1, sc decrease all around, sc in last stitch if necessary (15)


Row 9: Repeat row 3

**If you need more room for your messy bun, you can leave the last row off!

There it is! Only NINE rows (besides the brim) and that's it! I think the brim actually took me the longest to do, but after that it was smooth sailing from there!


Labels:

Monday, December 19, 2016

Reindeer Treat Bag - Free Crochet Pattern


Purchase the ad-free PDF printable/downloadable here!
Scroll down for the free written pattern and video tutorial.

It's the most wonderful time of the year.. to figure out gifts (if you haven't already)! Real Talk: Gifting is very stressful for me. I always want to please the person on the other end. I might like it, but will they? Is it practical? Is it useful? What will their reaction be? You could say social anxiety is a big part of my life. Well, this time around I'm telling myself - it's the thought that counts! And isn't that the truth? I am always appreciative of a gift, no matter what it is! Because it tells me that I was thought of, and that they cared enough to pick something out for me.


This year, like most years, I'm making 80% of gifts to give away. Christmas just came way too early this year for me, and unfortunately my two hands can't mass produce as quickly as I'd like them to, so I had to think of something small and simple. For one of my gifts, I came up with an adorable little reindeer that I can put goodies and treats in! I think he's super cute and functional!


If you have a few hours you can surely whip one up and put in some goodies! Candy, nail polish, chapsticks/lip balms, hand sanitizers, lotions, small toys, etc! 


Purchase the ad-free PDF printable here. Thank you so much for your support!


PIN it to your crochet boards on Pinterest.

Sharing in any way you can really help my blog going and the free patterns coming - thank you!


Video Tutorial

If you are unable to access the video below, you may need to disable your ad-blocker.
Or you may view the video tutorial here on YouTube.


Materials

Worsted weight yarn in the following colors: brown, tan, white, and red
H/5.00mm hook
G/4.00mm hook
small amount of poly-fil
(2) 6mm safety eyes
Tapestry needle
Scissors

Pattern notes

The pouch will be made first then all the little parts will be made before assembly.

Pattern


Pouch - Use H hook and brown yarn
Row 1: Magic circle, chain 2 and make 10 HDC in the circle. Slip stitch to first HDC
Row 2: Chain 2, 2 HDC in each stitch around, slip stitch into first HDC
Row 3: Chain 2, *1 HDC in first stitch, 2 HDC in second stitch, repeat from * until you get to the last stitch in the round, slip stitch to first HDC
Row 4 -17: Chain 2, 1 HDC in each stitch around, slip stitch to first HDC
Fasten off and weave in ends.

Nose - Use G hook and red yarn
Row 1: Magic circle, chain 1, and make 8 SC inside circle and slip stitch to first SC
Row 2: Chain 1, SC into next two stitches, 2 HDC into next two stitches, SC in next two stitches, 2 HDC in next 2 stitches, slip stitch to first SC. Fasten off and leave a long tail for sewing.

Eyes  - Use G hook and white yarn
Row 1: Magic circle, chain 1, and make 10 SC in magic circle, slip stitch to first SC
Row 2: Chain 1, *1 SC, 2 SC, repeat from * until you reach the end of the round. Slip stitch into first SC, fasten off and leave a long tail for sewing.
Make two eyes.

Ears - Use G hook and brown yarn
Row 1: Magic circle, chain 1, and make 4 SC in the circle. Slip stitch to first SC
Row 2: Chain 1, 2 SC in first stitch, 1 SC in second, repeat around. Slip stitch to first SC.
Row 3: Chain 1, 2 SC in first stitch, 1 SC in next two stitches, repeat around. Slip stitch to first SC.
Row 4 - 6: Chain 1, 1 SC in each stitch around. Slip stitch to first SC.
Fasten off, and leave long tail for sewing.
Make two ears.

Antlers - Use G hook and tan yarn
These antlers are made up of two parts, there is a long piece as well as a shorter piece that will be sewn on to the larger piece. Make two long pieces and make two short pieces.

Longer piece
Row 1: Magic circle, chain 1, and 8 SC into the circle. Slip stitch to first SC.
Row 2 - 11: Chain 1, 1 SC in each around, slip stitch to first SC.
Fasten off, and leave long tail for sewing.

Shorter piece
Row 1: Magic circle, chain 1, and 6 SC in the circle. Slip stitch to first SC.
Row 2 - 5: Chain 1, 1 SC in each stitch around. Slip stitch to first SC.
Fasten off, and leave tail for sewing.

Assembly


Stuff each antler (small and large piece with a small amount of poly-fil (or cotton balls or scrap yarn, what ever you have available). Sew the smaller piece onto the larger piece (about 3 rows down from the tip of the larger piece).

Sew the antlers onto the pouch 1 row down from the top.

Sew on the ears, leaving 1 row between the antlers and ears.

Take your 6mm safety eyes and place them in the center of the white crocheted eye. Attach eyes between rows 5&8 (counting from the top of the pouch down).

Skip a row down from the eyes, and sew on the nose.

Draw string

Using brown, white, and tan, cut a 22" piece of yarn of each color and braid. Knot at each end, leave a few inches after the knot at one end so you are able to thread it through a needle.


Weave back and forth through the HDCs at the top of the pouch. Once you've done that, you can cut the ends evenly. Pull tight to close the pouch.


What do you think?! What will you put in your pouch? Would love to hear from you!

Labels: ,

Tuesday, December 13, 2016

Harry Potter Infinity Scarf Crochet Pattern


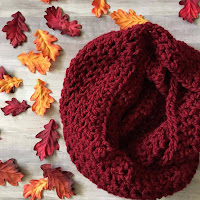
When Harry Potter and the Cursed Child came out, I needed to make a scarf that screamed Harry Potter. I made this scarf during the fall, and much to my satisfaction, it screamed "fall" as well! This burgundy and gold blend is so warm and cozy. I decided to make the scarf more feminine by making it into an infinity scarf. This was also super easy, it's only comprised of half double crochets! This is definitely a project to do while watching Netflix (..or Harry Potter!)


If you're looking for a more traditional scarf, you can totally use this pattern to make it just that! 

You can only find the yarn I used at Michael's, but go ahead and substitute any worsted weight yarn that you can find in similar colors. I thought these particular colors in this yarn were perfect.


Let's get started..

Materials:
Loop&Threads Impeccable yarn in Burgundy and Gold, 1 skein each
J hook
Tapestry needle
Scissors

Pattern:

Start with Burgundy

Row 1: Chain 31
Row 2: HDC into the second chain, HDC in each chain across (30 stitches total across)
Row 3 - 14: Chain 1, HDC in each stitch across

Switch to Gold

Row 15 - 28: Chain 1, HDC in each stitch across (30)

Switch to Burgundy

Row 29 - 42: Chain 1, HDC in each stitch across (30)

Switch to Gold

Row 43 - 56: Chain 1, HDC in each stitch across (30)

Switch to Burgundy

Row 57 - 70: Chain 1, HDC in each stitch across (30)

Switch to Gold

Row 71 - 84: Chain 1, HDC in each stitch across (30)

Switch to Burgundy

Row 85 - 98: Chain 1, HDC in each stitch across (30)

Switch to Gold

Row 99 - 112: Chain 1, HDC in each stitch across (30)

Switch to Burgundy

Row 113 - 126: Chain 1, HDC in each stitch across (30)

Switch to Gold

Row 126 - 139: Chain 1, HDC in each stitch across (30)

Slip stitch the first and last rows together. Fasten off and weave in ends.

Essentially, you're going to make 14 rows of each color all with HDC. In the end there will be 5 sections of burgundy and 5 sections of gold. After connecting the sides together, I found this scarf fit me very well. If you need to, add one more section of each color with 14 rows each. You can wrap it around before you close it up to see how it will fit.


**IF you want a traditional scarf, do not slip stitch the ends together. Instead add a fringe to each end. I made a smaller version for my son with the fringe that you can see below. Cut three or four 12-inch pieces of yarn, fold in half, loop the pieces through stitch, and pull the tails through. Do this in every other stitch across. Trim to make even. I alternated between gold and burgundy.


TIPS:

Switching colors
There are a few different ways to switch colors while crocheting, but I use a method that does not entail having to tie a knot. 
Below you will see..
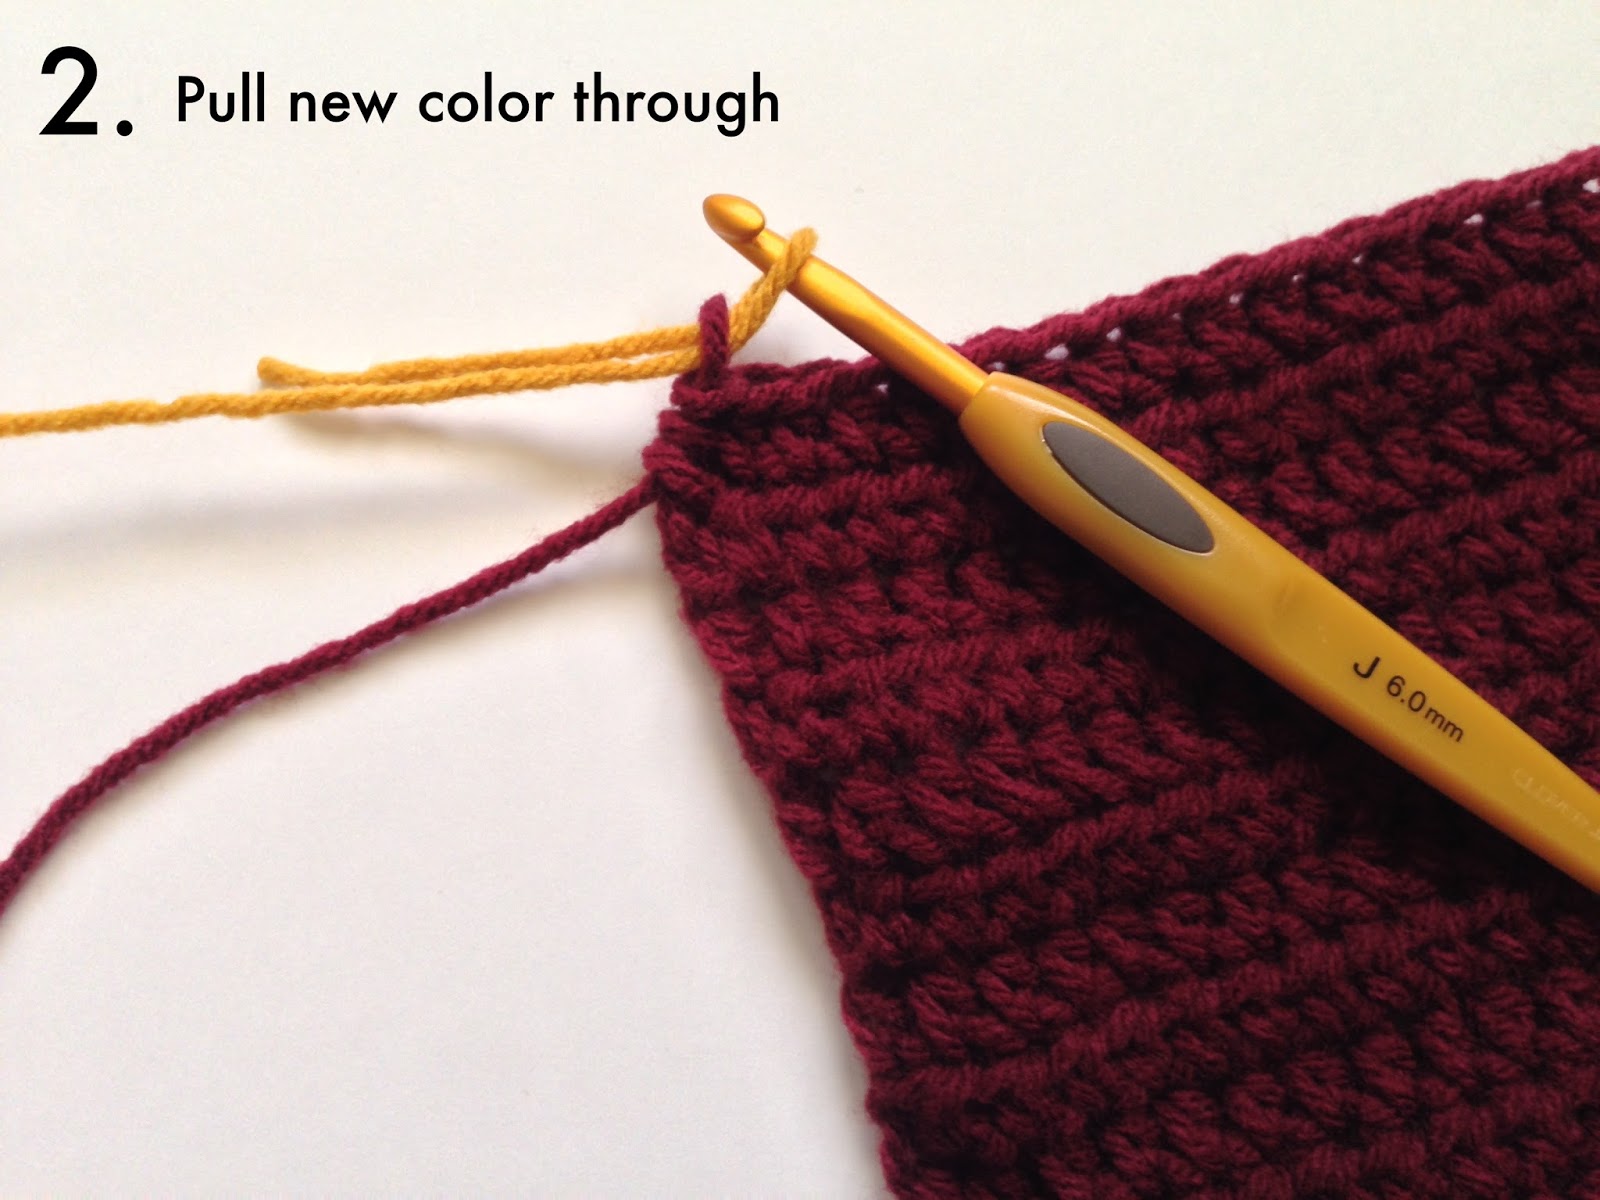
1.  I snipped the burgundy yarn after finishing my last HDC in the row and ready to switch colors (leaving about 6 inches of yarn)
2. Pull the gold yarn through the loop on my hook. 
3. Pull the burgundy yarn tight so you have a loop with gold yarn. 
4. Turn your work, chain 1 and place the tail ends of both gold and burgundy parallel to the chain stitches you will be crocheting in to. Go ahead and crochet as usual, making sure to incorporate the tail ends. 
I make sure to crochet over the tail ends for about 10 stitches, keep crocheting and after you're done with that row, you can go back and clip any bits that are poking out.


Slip stitching last and first rows
This is the part that makes your scarf into an infinity scarf.
To slip stitch together, turn your work so the last HDC you made is on the right side.
Lay out the scarf and fold over to match up the ends.
Keeping the loop on your hook, find the first stitch of the row to insert your hook into. Yarn over and pull through. Keep doing that all the way to the end - you should have done this through 30 stitches.
Sometimes it's tricky to find that very first stitch, if your number is less than 30 you will have to go back and do it again so the scarf is not uneven. (If you don't go back, and it looks good enough for you.. I won't tell. I've done it.)


Overall, this yarn is comparable to Red Heart super saver and not the softest. The scarf may be more rigid than desired. Throw it in a lingerie bag to wash, tumble dry low with dryer sheets and you will have a super soft finish!


Would love to hear from you! Leave your comments below!
Don't forget to Pin it for later!


Labels:

Saturday, December 10, 2016

Quick and Easy Free Crochet Patterns to Make For Christmas Gifts


Christmas is coming! If you're a last minute maker, I have the best quick and easy free crochet patterns that you can whip up in no time for your family and friends!


All of these free crochet patterns are not only quick and easy - they are useful! Browse through the free crochet patterns below and pick what you think your family and friends would love to receive as gifts for Christmas!

Then head to the craft store, get some yarn, and crochet these quick and easy gifts for Christmas with the free crochet patterns you like below! (Also, don't forget to check your craft stores website for coupons you can use!)

Here are 6 free and easy crochet projects to make!


1. Crochet Owl Eye Mask - These are self-explanatory and possibly one of the cutest creations. Head over to Good Stuff Mama to get the FREE pattern!


2. Crochet Coffee Cozy - These are super super easy to make, especially if you are a beginner! Don't be afraid to change it up! Use different colors, textures, and different buttons to make it the perfect gift for your coffee lover! Grab the free crochet pattern here.

Quick and easy chunky infinity scarf free crochet pattern

3. Bulky Infinity Scarf - This is one of my own patterns I've been making for quite some time! Soft, cozy, and basic! This is definitely something a beginner crocheter can do! This chunky crochet infinity scarf was always great for gifts especially since it's so easy to make!  Find the pattern here on my blog

Quick and Easy crochet handwarmers free pattern

4. Crochet Handwarmers - These work up very quickly and makes the perfect little Christmas gift! While you're at it, make a set for yourself - I find these perfect for shopping and every day wear! Head on over to claireabellemakes to get the free crochet pattern!

Quick and easy crochet ear warmer free pattern

5. Crochet Ear Warmer - This Ear Warmer is perfect for Winter! And the textures are awesome. Visit The Friendly Red Fox to get started on this quick and easy crochet project to gift for Christmas. 


6. Chunky Crochet Beanie - This beanie really is quick and easy to make! It is made crocheting the brim first then creating just 9 rows to complete the hat! Using chunky/bulky yarn makes this project fly by! There is also even a messy bun version for this pattern! Get the free crochet pattern here.

Want more free crochet patterns? 

I have rounded up my own patterns that can be crocheted quickly for last minute gifts! Find them here.

Labels: ,

Thursday, December 8, 2016

Free Crochet Chunky Infinity Scarf Pattern


I'm excited to share my first free crochet pattern with you! This infinity scarf is very versatile, soft, and cozy. It's one of my favorite things to make and give out as gifts. The color options are endless, and can fit into anyone's style. 


I personally choose to use the Loops and Threads Charisma yarn that you can find in your Michael's craft store. I have also used Lion Brand Hometown USA Yarn and Lion Brand Wool Ease Thick and Quick, which works nicely if you want a super chunky scarf, but you may need an additional skein as it's not a vary large skein. Amazon is a great place to buy this yarn - I can usually find it cheaper on there than the craft stores. Click here to get it

You can use any type of bulky yarn you can find. How do you know what is considered "bulky yarn"? You will find it on the label, like shown below. It will say "bulky" and also represented with a number 5.


You can also make your scarf two colors like I did by making half of the rows on color and half rows another color. I loved pairing these whiting and taupe neutrals!


Below you will find what materials you will need, how long it may take, and also what stitches you will need to know in order to finish this project. If you're a newbie - I advise watching YouTube videos to learn the stitches, there are tons out there!


Materials:

2 balls of bulky yarn
(Loops&Threads Charisma was used for the scarf pictured)
P hook
tapestry needle
scissors

Time:

Give yourself 1-2 hours to complete this project. If you're an experienced crocheter, it may take you much less time.

Abbrevations:

Double Crochet (DC)

Pattern:

Row 1: Chain 90, slip stitch into very first chain making sure there are no twists in the long chain.
Row 2: Chain 2, dc into each chain, slip stitch into first dc
Row 3: Chain 2, dc into each stitch around, join to first dc
Row 4-8: Repeat Row 3
Fasten off and weave in ends.

Tips: I've provided pictures on the trickier parts if you're a beginner! 


At the start of each row, chain 2 and 
double crochet into the first chain space.
Slip stitch into the first DC, not the chain 2.


Please share and PIN this pattern to your Crochet boards on Pinterest!


Labels:

Wednesday, December 7, 2016

Welcome to my blog!


Let me introduce myself:

My name is Maria. I've been crocheting every since my mom taught me at age 8. I really only started getting into crochet around the time my son was born in 2011, and I decided to start selling my work. Selling handmade items isn't as easy as it seems - there's a lot of factors that go into it, and it's super hard to find people who appreciate what "hand made" really is, and a lot of the time I was selling myself short. Previously known as "The Mad Hatter",  I've decided to venture off in a new direction and with a new name. I have a notebook full of ideas that continue to grow, and I want to make them come to life! I'm here in the blogging world to show YOU how to make these handmade creations! I know there are so many crafters out there that like to try to recreate something before they buy it, and I'm one of those crafters. I'm excited to enter this new realm of creating and teaching!

Blogging is a very new concept for me, but I hope to blossom and grow as time goes on! You're probably wondering.. what's up with the name? Maria's Blue Crayon. What?

Background information time:

Remember the days of AOL Instant Messenger (AKA "AIM" or "IM")? That was me. My screen name was: mariasbluecrayon. Actually, it was one of my screen names. My very first was sweetpea1822341 (and yes, those were the exact numbers). And I think we can all appreciate those numbers, because it was just so stinkin' hard to find a screen name that was not already taken!

Anyway, back to mariasbluecrayon. My sister helped me come up with the name years ago for AIM and it's perfect: easy to remember and no numbers. This came from the book "Harold and the Purple Crayon". If you're not familiar with the book, it's about a boy named Harold and he has this big ol' purple crayon that he takes with him one night, and basically draws and creates his own world using his imagination and his purple crayon. 

When I was thinking for a name for this blog, it was equally challenging to find a unique name that fit. I came to the conclusion that NOTHING I thought of was original and in this circumstance, it wasn't okay to slap a few numbers at the end of an already taken name. And when I say NOTHING, I really mean it. I thought for a whole two days, and every clever thing I could think of was already taken. My boyfriend and I joked about how it reminded us of finding that perfect, unused screen name years ago. And then it hit me. I already had that perfect "screen name". Maria's Blue Crayon. Why not? It's unique, and it fits.

So here I am with my blue crayon, ready to create what ever my imagination comes up with.